Author Archives: Stephanie

Quiet Book Dollhouse – Kitchen Page

Having a little boy, I don’t often get to do super girly sewing projects. I really wanted to design a dollhouse quiet book, so I decided to go for it!

This page is sponsored by American Felt and Craft, who provided the beautiful wool blend felt. It is such a delight to work with! The feel of it really doesn’t compare to craft felt. If you can afford to spend a little more, I really recommend using wool blend felt. It has been holding up so much better than the acrylic.

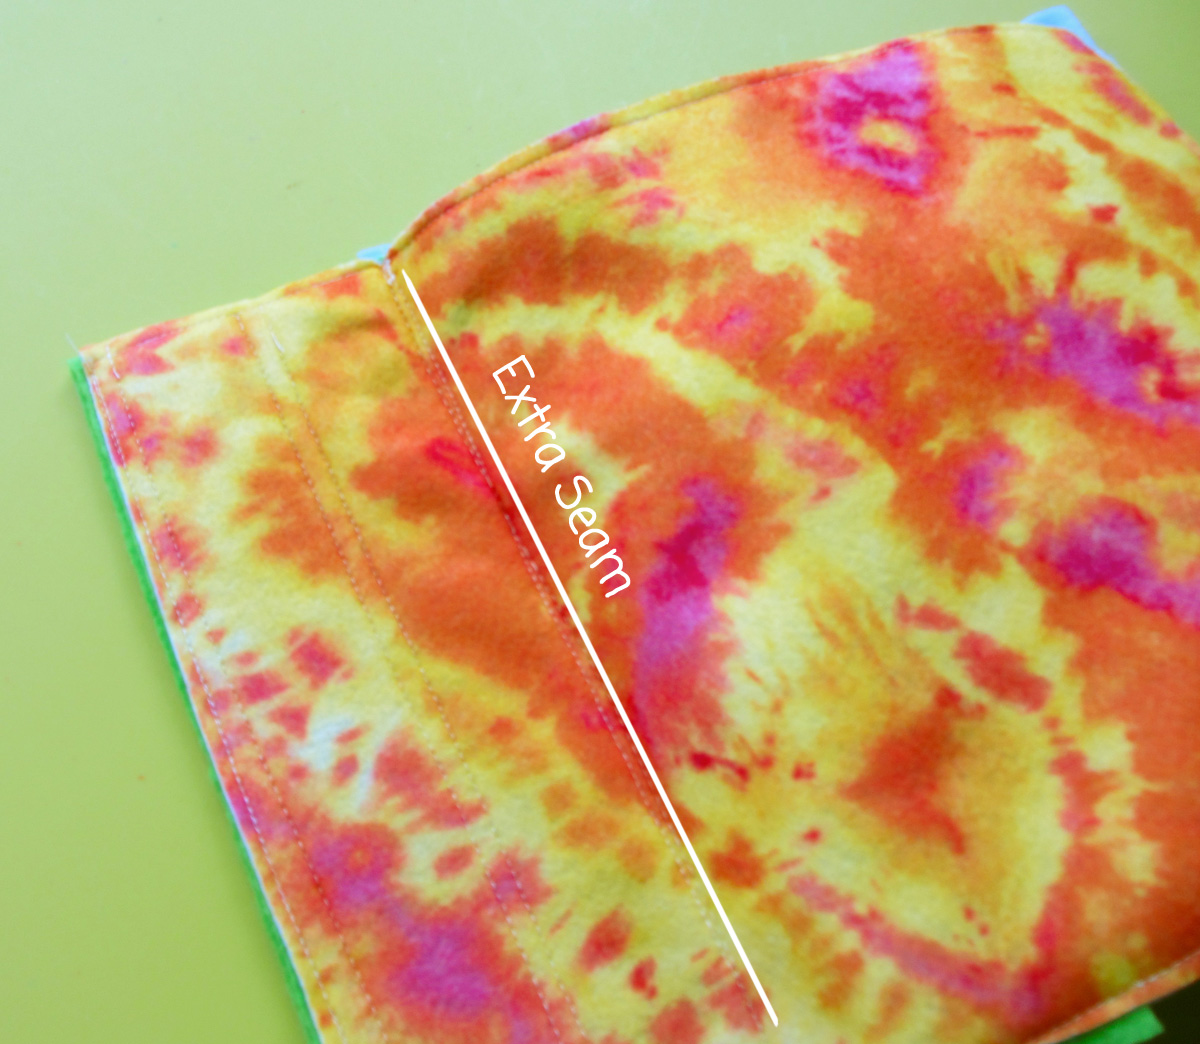
You’ll notice from the photos that this page is laid out different than my others – there is no blank area on the side to allow for the binding/grommets. This is because I plan to fold the pages in the center and sew them together as a mini book that is 6″ wide x 9″ high when closed. I will be posting each double page separately, then showing how I bind it all together. You could use the elements from this page to design a regular quiet book page, but you’ll need to rearrange and shrink some things.


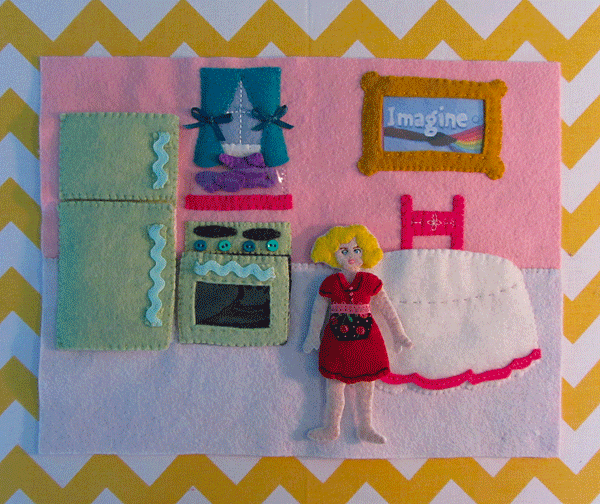
The book will contain one felt doll (or possibly two) with Velcro underthings. I plan to make two outfits per double page. They will be stored on the bedroom page, but there will be places to put them on each spread. Here the table is a pocket. This page also contains many little food items that were a great way to use up felt scraps! Because they are tiny, I’d recommend this page for a 4 year old unless you are supervising. The colors I used are all totally changeable, so just think of them as suggestions. I was in love with that green “honeydew” color and wanted to pay homage to the avocado appliances I grew up with.

What I Used: The pattern, felt (in pink tutu/pink, soap sud/pale gray, white, honeydew/spring green, hot pink, salt & pepper/dark charcoal and bisque/flesh), felt scraps (in lilac, gold nugget/gold, peacock/aqua, rainy day/light blue, big apple/red, cilantro/olive green, rubber ducky/yellow, orange juice/orange, chocolate/brown, banana nut muffin/tan and gray flannel/gray), clear vinyl, white snag-free Velcro, size 1 sew-on snaps, 7mm mini buttons, ric-rac and ribbon scraps.

I sewed this entire page by hand, but you could certainly machine stitch some or all of it.

Background Elements: I started by sewing a strip of felt down for the floor. I used “soap sud” which is a white with a pale tint of pink and blue to it.

For the frame hanging above the table, I cut a rectangle of clear vinyl to fit the opening, then straight stitched it onto the back. I sewed the frame to the wall, leaving the top open so you can slide in a photo. (I stitched across the top of the frame just so it would would match the other sides – but it isn’t sewn to the background.)

For the window, I cut a rectangle of light blue and sewed it down with a + shape of white back stitch. I sewed a strip of white to the bottom for the sill, then sewed the curtains on, leaving the bottoms open for volume. I made two little aqua blue bows and sewed them on as curtain ties. I stitched through the knots so they won’t untie.

I added a shelf under the window to hold the tea set. It is just a strip of hot pink felt sewn down over a small pocket of clear vinyl. The vinyl holds the tea set in place while it looks like it is just sitting on the shelf.

Oven: I sewed down the inside of the oven with snaps in the upper corners, then sewed down the stove top above it. I added 4 7mm buttons (from the craft store) as dials and two felt burners. I made the door by sewing the matching snap halves to the upper corners of the inner door felt and sewing some ric-rac to the door front as the handle (I added squares of felt over the ends of the ric-rac to hide where it was sewn on and prevent fraying.) I then sandwiched clear vinyl between both door sides and sewed them all together. I sewed the oven door to the oven along the bottom, making sure the snaps lined up.

Refrigerator: I started by sewing down a white rectangle the size of both doors. I also sewed a strip of the door color down to separate the freezer from the fridge. I cut scraps of clear vinyl and sewed them down into pockets to hold the food. I added one snap for each door. To make the doors, I sewed ric-rac handles to the front pieces the same way I did it on the oven. I sewed the matching snap halves to the white inner door pieces, then sewed the two sides of each together. I sewed the doors down along the left sides, making sure the snaps lined up.

Table & Chair: I started with the chair (half a chair, really.) The table is sewn as a pocket so the doll can “sit” at the table. I added the top portion of a chair to make it look like she’s sitting. I did some decorative stitching, including a daisy stitch in the center. I sewed it down so the bottom would be hidden behind the table. To make the table, I sewed the hot pink trim to the bottom of the tablecloth. I added an extra layer of white felt to the back of the table top (the oval shape) so the bright chair wouldn’t show through. I also added a line of stitching in gray to show the edge of the table. I sewed the table down along the sides and bottom to make a pocket.

Tea Party Items: For the tea set, I cut a front and back piece for each item (one tea pot and two cups) and sewed them together. With the cups, I left the tops open.

The cookie sheet is made with tan ovals sewn to the top layer of the cookie sheet, then the front and backs are sewn together.

For the fruit bowl, I sewed together two layers for each fruit, then sewed the bowl around them, so they are stitched in place and can’t get lost.

I did the same with the ice cream bowl. (I didn’t have extra pink, since I used the full sheet for the background. I ended up cutting a square of felt out of the back of the page behind the oven and using that for the strawberry ice cream!)

For the cake, I started with the flame, sewing the back and front together. I then sewed the two sides of the candle stick together around the base of the flame. I sewed the two layers of the plate together. I sandwiched the end of the candle between the two cake pieces and sewed it down around the top of the plate.

The milk has two identical sides – each with an M sewn on. Then, the two sides are sewn together.

Doll: The doll is made with colored felt on the front and plain white on the back. I started by sewing the hair on to the body piece around her face. I then embroidered her features on. For the mouth, I used the same technique that I used one my princess finger puppet, but I added a stitch of white for teeth between her lips. Her nose is a dashed stitch that is tilted up a bit. I started the eyes by stitching the almond/eye-shape with white thread. I made a French knot in the center, and made a tiny stitch from the edge of the knot through the center to really hold it in place. I outlined the tops and outer corners of the eyes with brown thread, then back stitched eyebrows. Her under clothes are cut out of snag-free Velcro to hold her outfits on. I sewed them down the same way I would sew felt. I sewed a tiny belly button, but it’s hard to see. Once she was decorated, I sewed her backing on.

Clothes: Her red dress was decorated with black back stitch at the cuffs, collar and hem. The buttons are pink French knots. Her apron is a cherry ribbon I found at Dollar Tree. I folded the bottom under into a curve as I sewed it on. I made her apron belt with a scrap of pink ribbon. I sewed Velcro to the back piece, lining it up with her body, then sewed the front and back together.

The green dress has a gingham ribbon scrap sewn on as a belt. I sewed on a white collar and added two 7mm mini buttons. I sewed the Velcro on to the back then sewed both sides together.

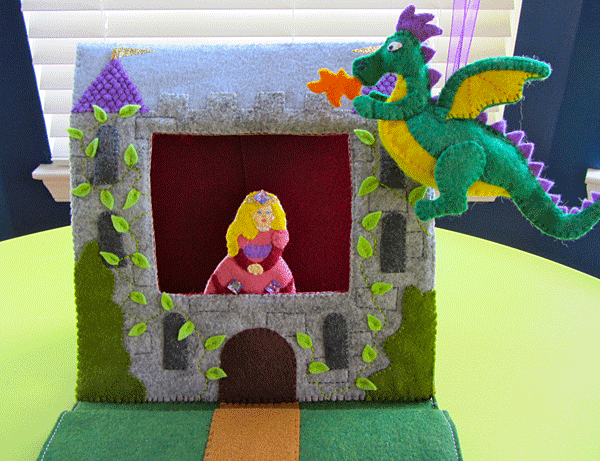
Stay tuned for two more double pages for this dollhouse book, followed by the exterior of the house and book construction! I am posting progress photos on the Facebook page as I go. I am also working on a solar system page, so photos of that may pop up too.

Do you have a blog or online business that fits in well with the theme of Image Our Life? For as little as $5 a month, you can have your banner in the sidebar. I am also interested in swapping banner space with other blogs. Drop me a line or check out the sponsor page!

Preschool Fun – Letter A for Apple

This post has been updated to feature our whole week of activities.

This week I started homeschooling Jax. He will be 3 in February, so we are starting with very basic preschool lessons. He knows his alphabet, can count to 20 (and sometimes 35) and knows colors and shapes. I want to focus a lot on pre-writing skills, crafts for dexterity, music, science and tasks that increase attention span.

After asking on the Facebook page, I decided I’d share what we do here. I only expect to post once a week about his lessons. I have to work in the afternoons, and some mornings are taken up running errands (that pesky grocery shopping!) But I’ll try to stay on top of it and share where I get my resources.

This week we are focusing on the letter A is for apples.

We started our school week with A-shaped apple pancakes. To make them, I used a pancake mix that only needs water. I replaced half the water with unsweetened applesauce and added cinnamon, ginger and all spice. I used a spoon to drip the batter into the shapes. Then I peeled and chopped an apple and put it in a bowl with a tablespoon of brown sugar and some cinnamon. I stirred it up and microwaved it 2 minutes for yummy cinnamon apple topping.

Monday

We started at the chalkboard to take a weekly photo for our alphabet book. Jax held up a mini apple (and couldn’t resist sneaking a bite.) After the photo, I helped him trace a large uppercase and lowercase A on the chalkboard in pink, then had him do it himself in blue. He did great!

We moved to the table and worked on tracing the number 1 with dry erase markers. (I got our number tracing sheets here and laminated them.) Jax has been excited about his new dry erase markers since we got them Sunday night. I had to guide him in tracing all the 1s. He just wanted to scribble.

We moved on to craft time.

Color Sorting Apple Trees
The first craft is a color sorting with an A is for Apples theme. Start with a blue background paper. Cut out 3 brown As to use as tree trunks. Cut out three green treetops. Make the labels, one for each color: red, yellow and green. You’ll need about 6 pom poms of each color, a glue stick and a plate with some glue to dip in. I glued down the treetops and A trunks with Jax’s guidance, then added a color label to each tree. I had Jax pick a pom pom, dunk it in the glue and stick it on the right tree. He really loved it!


a is for apple
I wanted to do a lowercase A as well, so I pre-cut a red lowercase A, a white circle for the apple flesh and a green leaf. I guided Jax in putting glue on the backs of the shapes, then he put them on the paper (following my instructions.) I showed him how to make an apple seed, then he made the rest. (You could glue real seeds down with an older child.) We drew one lowercase A together, then I had him do one. (I told him to make a circle, then add a line. He did better than I thought he would!)

I will be putting all of his creations (except for lumpy things like the pom poms) into a hard bound sketch book (14″ x 11″) with an alphabet theme. I’ll show what we have at the end of the week.

We moved on to an alphabet matching game I printed out. I had a set one upper and lowercase letter cards that were cut in half, plus a set I didn’t cut out at all. I had him take each half card and put it where it belonged on the uncut sheets. He was very proud when he finished, but I had to work to keep him focused. I got the printables here.

We did story time next. I choose Pepo and Lolo and the Red Apple (Jax loves it because we act it out), How Do Dinosaurs Go to School? and Planes. Jax chose a couple other books as well.

I offered Jax the chose of music time or math, and he chose math. We used our abacus to do some simple addition. He doesn’t get it yet, but we are getting closer.

Resources:
Number Tracing Pack – Confessions of a Homeschooler
Alphabet Flash Cards – Homeschool Creations

Tuesday

Tuesday Jax woke up with a cold, so it was tough having him stay focused. We kept our activities short and I followed his lead as to what he was interested in doing that day.

He requested the “ABC cards” game (Alphabet Flash Cards) we did Monday, so we played that again. When he had them all matched up, I added a twist for cleaning them up. I asked him to find different groups of items, such as “things you can eat”, “toys”, “animals” or “things that are blue”. I’m really happy we had these printed these out. I think we’ll get a lot of use out of them.

We did the same number tracing page that we did on Monday. I stuck a laminating sheet to the front of it so we could reuse it. Jax has trouble making the 1’s because I think he finds them boring. It is much more fun to scribble wildly and make big swooshes.

We did a worksheet for tracing uppercase As to put in Jax’s alphabet book. We counted the steps to remember how to write it: one, two, three! The worksheet was from Oopsey Daisy. Jax did really well and did the last three As on his own, with me just setting his hand at the starting point for each A.

We did some dancing to music after that, with me having him follow my movements the best he could. I’m going to try to do music and movement once a week at least. Since we wasn’t feeling well, we ended on storytime. We read Dr. Seuss’s ABC and My Nursery Rhymes Collection.

<

Resources:
Number Tracing Pack – Confessions of a Homeschooler
Alphabet Flash Cards – Homeschool Creations
A is for Apple – Oopsey Daisy

Wednesday

We had errands to run, so we did school in Starbucks on the iPad. We made a picture book with sounds with My Story – Book Maker for Kids. We practiced writing with Write My Name. I really love that app. We stopped by the playground to play with other kids, but Jax managed to hit his head hard, cutting our playtime short.


Thursday

Jax was interested in playing with his new supermarket set. I recently bought this for him from MYHABIT, and I love it! (You have to sign up to see the sales they have there, but it is free.) It is a great toy! It doesn’t come with food, but you get a cash register with money, a scanner and a card swiper, plus a produce scale. Mine arrived with a crack in the card swiper, but they sent me a whole new cash register set to replace it. The set isn’t on MYHABIT any longer, but Amazon has a decent price. Zulily has a different one that I like a lot, too.

I already had a magnetic chalkboard up on the wall and wooden number magnets, so I drew some of the food items we had and Jax and I did number recognition games for each one.


I wasn’t feeling well Thursday, so we repeated a lot of the activities we had done that week, including rereading the same books. He enjoys the repetition so he can start saying the words along with me.

Friday

First page in Jax’s alphabet book.

We focused on alphabet crafts for Jax’s alphabet book on Friday. I have been cutting out letters and pictures from old magazines and ads, so we glued them down to a page with the letter A on it.

We did a lot of practice writing upper and lowercase As, first on the chalkboard, then on colored paper. We said “one, two, three” to make the big As, and “circle and a line!” for the lowercase As. He did very well and was excited by my cheering him on and high-fives. I cut some out to glue down around a large A he wrote.

We did some quick letter puzzle crafts with construction paper. I drew the letters with dotted lines and cut out paper strips to match. Jax put the puzzles together, then we glued them down.

Resources:
Alphabet Cut & Paste Sheets – Homeschool Creations
Alphabet Beginning Sounds Poster – Homeschool Creations

Castle Puppet Theater Quiet Book Page

It’s a quiet book page! It’s a puppet theater! It’s both!

This page was inspired by the rich colors of wool blend felt carried by American Felt and Craft, who provided the felt for this project. (Visit AFC’s Facebook page for sales and giveaways.) There are so many beautiful shades of green, gorgeous grays that look like stone and bright jewel tones. And the fact that the wool felt is stronger and thicker than craft felt helped to make this page work well.

This page doesn’t use anything special other than some plastic canvas, I used glitter ribbon for some of the tiny pieces, like the crown and the sword, but you could swap that for felt. I also used many shades of green because I had leftovers from other pages. The ground (“fresh cut grass”) and the dragon (“jade”) are the most important greens. the leaves (“limeade”) and shrubs (“cilantro”) could be swapped for one of those.

What I Used: The pattern, wool blend felt from American Felt & Craft (in fresh cut grass, beet x 3, powder blue, white, gray flannel, salt & pepper, cilantro, limeade, royal purple, doe, orchid, rubber duckie, peaches & cream, indigo, jade, orange juice), plastic canvas (I got mine at the craft store), glitter ribbon in gold and silver (I got mine at the craft store) and sew-on gems.


This page fits into my normal quiet books, yet unfolds into a working finger puppet theater. There is a pocket to store the three puppets, a wizard, a princess and a knight, plus a stuffed dragon that flies on a loop of ribbon. There are two supports that can be stored in a loop of felt when the page is closed. The supports slip into little pockets to prop the stage open.

Supports: Sew two layers of plastic canvas inside the felt strips to make two supports. I cut my plastic canvas slightly smaller than the felt.

Castle Facade: Start with a 9″ square of gray felt and cut away the roof line using the sky pattern. Layer a strip of light blue behind the castle piece to make a 9″ square again and sew them together. Cut out the puppet theater hole. Sew on the windows and door, then sew on the shrubs. I cut out a bunch of little leave and stitched a wandering back stitch vine up each side of the castle. I used two back stitches to attach each leaf. Sew on the two purple tower roofs. Cut bits of ribbon or felt into triangle flags and sew them to the roof peaks. (My ribbon was non-fraying, so I was able to easily cut it into shapes.)

I embellished my roofs with embroidery to look like tiles. To do that, start with a long horizontal stitch, but don’t pull it tight. Come back up through the felt down at the point where you want your tile to end, making sure to put the needle through the stitch. Go back down through the felt making a tiny vertical stitch that holds your first long stitch down into a scallop shape. Repeat, staggering the scallops as shown.

Backstage: Cut out the burgundy felt into the 9″ square with a matching hole cut out. Sew it to the back of the castle facade with plastic canvas in the middle. Take the two curtain pieces and overlap them slightly in the middle. Sew them to the top back of the theater piece.

The castle theater gets sewn to the right hand side of the two-page spread. Line the top of the castle up with the far right side of a full 9″ x 12″ sheet of burgundy felt and sew it down along the bottom. On the left side, decorate the few inches that are in front of the castle with grass and a road. I matched my road with the width of the door.

Cut out the storage pocket felt piece and sew it to the page under the castle as shown on the pattern and the photos. the skinny side pockets are where you insert the bottom of the supports. Sew the smaller pockets to the back of the castle after pinning them to see what angle works best. Sew the pockets upside-down so the top of the supports can slip up into them.

Front Lawn: That side of the two-page spread is super easy. I just sewed more road down to the grass color. You could embellish yours with flowers, a fountain or a hedge maze… Whatever you can imagine!

To construct my page, I sewed purple felt (I just used craft felt) to the back of each side of the spread. You have to start and stop your seam to get around where the castle is attached on that side of the page. I then lined the pages up facing each other (as they will be when the page is closed, and sewed my usual seams.

Puppets: All three of my finger puppets have plain white felt backs. If you wanted to have yours be two-sided, you’d need to work out how they would look from behind.

Knight: For Sir Knight, I started with his basic shape cut out of gray. I laid his face in place and sewed the helmet and neck pieces over top. I sewed his eyes with French knots and a tiny horizontal stitch going from the center of each knot out to the corner of his eyes. This makes sure the knot doesn’t wiggle loose. His mouth is just back stitch. I sewed down his tunic and the trim next. For his shield, I cut some glitter ribbon into a J for Jax. You could do a cross or another letter or symbol. I sewed the J to the inner shield piece, then sewed that and the outer shield piece down. I cut the sword blade and hilt out of more glitter ribbon and sewed them down, adding the glove over top.

To make his backing, I cut out white felt to the same shape as his body, but added an extra 1/4″ to each side from the bottom down. The knight is fairly skinny, so adding width to the backing gives room for bigger adult finger to play too. The photo to the right shows one side sewn and the other side read to be sewn. Once you’ve sewn the back on (leaving the bottom open for your finger), trim the bottom edge so it is flush with the front.

Princess: The princess was fun for me! I don’t get to do many girlie sewing projects. You can personalize her by changing up her colors.

I started with her shape cut out in pink. I sewed down her belt, arms, hands and puffy sleeves. I sewed on her sash and added some sew-on gems. I laid her face piece in place and sewed her hair down over top. I added some stitches to her face to make her chin, then made a French knot pearl necklace and earrings. I made tiny stitches in the knots as before to secure them. Her eyes are the same as the knight’s, and her nose is a little stitch. Her mouth has two stitches for the lower lip (the bottom stitch a little smaller), then a longer stitch with a little “v” stitched over top to make the bow of her lips. See the drawing to get the idea.

The finishing touch was her crown, made out of glitter ribbon with a sew-on gem.

Wizard: The wizard is pretty simple, but very cute! Start with his shape cut out of indigo felt. Lay his face in place and sew the beard down on top of it. Lay a scrap of ribbon (mine was purple) on his hat, and sew the hat brim in place. Cut a scrap of felt in a mustache shape and sew it down along the top side. His eyes were made the same as the others’ and his mouth is made like the princess’s lower lip (the two dashes.) Sew down his sleeves and hands, then sewn on a star and stitch the wand with back stitch.

For both the princess and the wizard, I cut their finished shape out of white felt and sewed the back on (with the bottom open) to make them into finger puppets.

Stuffed Dragon: The dragon is the hardest part, as I made him into a full stuffed animal. I wanted him to be able to fly in to the castle from any angle.

The dragon has two sides that are the same, but mirrored, so do everything twice for him. I started with the wings. I stitched two curved back stitch lines to show the veins/folds int he yellow part. Then I sewed each wing together with the yellow layered between the green backing and the green outer edge. Remember you need a wing for each side, so they have to point opposite directions. Sew the green body pieces to the yellow body pieces and then sew a wing onto each (picture 1 below.)

For his face, I stitched on the white eye, then made a French knot with a reinforcing stitch for the iris. I back stitched an outline around it. I satin stitched a sideways tear shape for his nostrils and back stitched an arc over each one. I sewed the two sides of his purple crest together and the two sides of the flames together. I cut out a bunch of back scales (including a few smaller ones for the end of his tail.) Have a loop of ribbon ready for his back. I sewed the two sides of the dragon together from under his chin, around his nose (with the flames in his mouth) over his head (with the crest in place) and then down his back, adding scales and the ribbon loop between his wings (see photo 2 below.) Sew all the way around his tail, but stop when the green ends.

Sew all the legs together, and sew them in place on each side. Add a little stuffing or batting – not too much or he’ll be too fat to store int he page. Take the chest piece and stitch it to the edges on the yellow as shown below. Trim the piece as needed to get it ti fit just right.


Jax didn’t know what a puppet show was until I started sewing this, but he got so excited when he figured it out. His current favorite thing to do is steal the puppets off my hand mid-show. He told me the knight puppet is “Jackson”, the princess is “mama” and the wizard is “dada”. Hah! (No, my husband doesn’t have a long white beard and a wand.)

You don’t have to sew this into a quiet book page. You could add a Velcro closure and felt handles to turn it into a portable puppet theater case!

Enjoy! Stop by the Facebook page to see progress photos from my next two pages. they are fun ones!

DIY Ribbon Station

Scroll down for a giveaway!

This couldn’t be easier!

I’m in the process of turning Jax’s old nursery (a room that adjoins our master bedroom) into a craft room. A spare room down the hall is becoming Jax’s big boy room. My budget is pretty much nonexistent, so I’m thrifting and salvaging whatever I can. On a recent trip to my childhood home, I picked up this old hutch shelf that was on the floor of the basement under our utility room table.

After driving it the 60 miles home, de-spider-egging it, sanding it and washing it, I had this:

Not a pretty sight…

It had good bones, and I am in need of craft room storage. eventually I’d like a table for the room that is wide enough to put these shelves on. For now, they will take up a chunk of my vintage desk. The desk came in the basement of our house when we bought it. Since the desk was painted white (but needed a fresh coat), I decided to paint the shelves as well.

For both the desk and the hutch, I used white paint that we had in the basement. I also used it on a vintage dresser from my childhood basement.

Once it was painted with two coats, I headed to the hardware store. I got a dowel, spray paint and screw-in eye hooks. (I already had the larger screw-in hooks.) My shelf was about 25.5″ wide inside the shelf. I had my dowel (which came in a 3′ length) cut down to 24″. I chose a 3/8″ dowel because it is strong and less likely to bow under the weight of the ribbon spools. It is exactly the width of the holes in most of my spool, so the smaller spools got put in vintage jars.

I screwed the eye hooks into the ends of the dowel and spray painted the whole thing, as well as the two hooks. When it was all dry, I screwed the hooks into the sides of the shelf and loaded my ribbon on the dowel. I ended up opening my hooks wider so I could slide the eye hooks down onto them easily.

Scissors on hand to cut my ribbon.

It was so simple, but works so well!

My shelves don’t have a lot going on yet (don’t mind that unpainted letter S up there – I just got it int he dollar spot at Target.) I haven’t even finished painted the room, so I’ve yet to fully move in. But I am so happy to get all those pretty ribbons out of ziplock baggies!

What do you think of how it turned out?

Introducing Sponsors!

Do you have a blog or a business you’d like to advertise on Imagine Our Life? Ad spaces are now available here. I am giving away a chance to win a code for one free month of advertising on this blog. The winner will receive a free side bar ad. Enter below!

a Rafflecopter giveaway

Thrift Store Gems

Sometimes I visit the thrift stores because I haven’t been there in a while, and other times I feel compelled to. The latter is when I tend to find my best deals!

Yesterday I was compelled to visit all three of the thrift store in the area. They are all run by the same charity: a children’s goods store, a clothes and housewares store with an outdoor kid’s area and their newest all-around store that has furniture. That new store is difficult to visit with Jax because it has breakables everywhere and a toy section with signs saying not to touch (the opposite of the rules at the kids’ store.) I was ready for it, though, with Jax in the stroller with my phone and a bag of crackers.

I go turbo speed through thrift stores with Jax. He isn’t very patient when he isn’t allowed to “help” and touch. But 5 minutes is plenty when you aren’t looking through the clothing racks. I was lucky I’d chose yesterday to visit – they were having a 50% off sale on all furniture that had been there over a week (they date the price tags.) Unlike last visit, they had wooden chairs! I had two choices: there were 2 ladder-back chairs for $9.75 each that just barely made the week cut-off and a lonely Windsor fan-back, brace-back chair for $4 (it has paint stains) that was a couple weeks old. I chose the Windsor due to price ($2!!), comfort and not wanting to break up a matched pair. My grand total at that store was $4 for the chair and a wall hook thing to paint for Jax’s big boy room.

Next stop was the kids store. I normally love it, but it was an hour later than I normally go (and summer), so it was packed with moms and kids. Jax immediately started misbehaving from over-stimulation. I looked super-quickly, bought him 2 dvds for $4 total, then carried him screaming (him, not me) back to the car. Ugh!

I almost skipped the last stop, but it was only a block away and I’ve been on the hunt for some large kid items (a push trike and a wooden table). They put their kid items outside by the donation drop off at that location. It is mostly plastic ride-ons and kitchens, a million sit and spins and other plastic flotsam. But, I’ve found a great wooden fridge there, and I’ve seen tables in the past.

When we got there, I wasn’t impressed. Everything was dirty, broken plastic. But I let Jax explore the heap for a while. A woman pulled up in her minivan while he was playing and handed two Radio Flyer trikes to the donation volunteer. He walked them right over to the toy pile while she drove away. They were both pretty much perfect – just lacking the push handles for the back! I figured if it cost less than $10 I’d get it, as I know Radio Flyer is good about stocking replacement parts.

Jackson’s “Bi-cuh-sill-lull”

We carried it inside and before I could even ask the price, They said, “$3!” Say what?! Sold! Jax sat on it ringing the bell as I paid. He had fun riding it with his daddy later that evening but he gets a little frustrated after a while. His legs need to be one inch longer to really make it easy to pedal all the way around. It is super squeaky and needs an oiling. We are looking into the parts needed to add the handle on. Even if it is $20, it is still cheaper than the original $70 price!

I need your help!

I’ve chosen the wall color and fabric for my craft room. The fabric will be on a bulletin board and I’m purchasing a yellow and white ironing board cover from Etsy. But what color should the chair be? Yellow or coral? Thanks to all who have given opinions already on Facebook! It’s such a hard decision! You can’t go wrong with a creamy, buttery yellow, but the chair was only $2 – why not go bold and bright with coral?

$2 thrifted chair – paint it yellow or paint it coral?

A quick note: I’m also working hard on my next quiet book page! It has a lot of details, so it is taking a while. Stop by the Facebook page if you’d like to see regular updates. I post photos nearly every day. I also post them to Instagram (username “iolstephanie”).

Sewing Basics – Blanket Stitch

I often get asked how I sew the various loose elements that go with my quiet book pages. For the most part, I use a blanket stitch. Here is a little tutorial with a few tips and tricks I like to use.

Cutting Out the Shape


When an element has a front and back, I like to cut both sides out at once so they match up well. Since most felts have a softer “front” side, I fold my felt sheet and pin the pattern piece to it so I end up with the soft felt out for both sides of the element. I cut the shape out loosely at first, because it can be awkward to hold the whole sheet while cutting. Then I go in and cut it accurately. I remove the pattern paper and trim any uneven edges and felt fuzzies with sharp scissors.

Starting to Sew


I use two strands of embroidery floss when I sew. See my detailed tutorial on how to thread your needle with 2 strands here. Basically, you cut your thread twice as long as you’d like to work with, separate out one strand of the 6, fold it in half, and thread it through your needle, loose ends first. This will give you a loop at the end of your thread.

Decide where you want to start stitching. I like to choose a less visible place. Here I chose the inner corner of the heart. Bring your needle up from behind, but don’t pull the thread all the way through. run your needle through the loop at the end of the thread and pull tight. Start the next stitch by coming up from behind. Again, don’t pull the stitch tight yet.


Run your needle from front to back through the loop, then pull the stitch tight. Repeat: come up from the back, don’t pull tight, go back through the loop and pull tight. When you get to a corner, it’s best to do a stitch straight into it. That way your corner stays defined. Continue on until your thread starts to get short.

Ending a Thread


But what happens when your thread gets too short and you have more to sew? Here’s what I do. Start by flipping your piece over and run your needle through the last stitch you made. Don’t pull it tight yet.


Pass the needle through the loop of thread and pull it tight. There will be a tiny knot at the edge of your piece. (Repeat this if you really want a strong hold. Or use a drop of Fray Check.) Insert your needle into the hole of the stitch and pass it between the layers of felt, coming up through the hole of another stitch. Cut the thread off flush with the felt. This will hide your thread tail inside the piece.

Starting a New Thread


Now we need to start a new thread. Thread your needle the same as before so you have a loop at the end. Start to sew the same way you did in the beginning, but start over-top of your last stitch. This way, you won’t have a gap in the thread running along the edge of your piece. Bring your needle up from behind, but don’t pull tight. Go back through the loop of thread and pull tight. Move over and come up through the felt from behind to start the next stitch. Continue on in blanket stitch.

Finishing Up


Finishing up is pretty much what we’ve been doing before. In order to not have a gap in the thread along the edge of your piece, Make a stitch over-top of your first stitch. Then, on the back of the piece, run your needle through the stitch and back through the loop of thread to make a knot. Pass the needle down through the stitch’s hole, between the layers of felt, and back up through another stitch’s hole. Clip close to the felt to hide the thread tail.

All done!

Link-o-rama!

This week is going slooooow! We recently got back from my birthday weekend at the beach and I already feel like I need another vacation! Jax has been a handful, but at the same time, having another language explosion. It’s really crazy how much he talks now! I constantly have people asking how old he is because his speech and loads of hair make him seem older.

I am starting a big room switch-a-roo upstairs. We co-slept with Jax much of his life. A couple months ago I moved his converted crib/toddler bed into our bedroom to start transitioning him to sleeping alone. He sleeps the first half of the night in his bed before joining us. The next step will be creating a big boy room for him. I’m thinking of just going with a mattress on the floor because he constantly rolls out of his toddler bed. The coolest room besides our bedroom is our second guest room. So I cleared out the spare room full of old furniture and junk and moved the guest room to there. Next I’ll be painting a mural and designing some fabric for bedding. He wants a train theme, but I’ll expand it to “transportation”. His old nursery, a small room adjoining our master bedroom, will become my craft and laundry folding room.

I’ve already moved the contents of Jax’s closet to his future room since it was only winter clothes hanging up. I had the side piece of his crib in there too. What to do with that giant thing?? I ended up standing it on its side and making it into a blanket rack! Perfect!

Here are some links for you!

Happy Tuesday! I hope your week is going a little more smoothly than mine… But, at least it isn’t Monday anymore!

Banana Split Quiet Book Page

First, a quick announcement – the winners of the camping quiet book page felt and supply give away! The two winners of mini LED lights are Renee R. and Jean J. The grand prize winner of felt, crinkle material, a mini LED light and some clear vinyl is Ashley S. Congrats! I’ll be emailing you for you mailing addresses. (Renee, email me. I don’t have your email address!)

Just before my birthday weekend, I realized we were going out of town on an 8 hour round trip in the car to the beach and I wouldn’t have the supplies for my next page yet. I dug around in my stash to see what I could make from my stash of scraps. I was inspired when I looked at some of the samples sent to me by American Felt and Craft. Sprinkle beads, nut beads and a felt cherry? Sounds like an ice cream sundae to me!

I went with a banana split and had just enough of the green dot felt I used in the ice cream parlor page to make them coordinate. I actually had to sew an extra seam to make the pages smaller because I didn’t have enough light blue and green dot to cover the whole 9″ x 12″.

What I used: The patternsprinkle beads, nut beads, red felt ball, felt (in green dot, pink dot, light blue, white, pink, hot pink, brown, dark brown, yellow cream and gray), clear vinyl, blue-tinted vinyl (you can use more clear instead) and 3 sew-on snaps.

The Background: Very simple… just sew a table onto your background felt! Later, you can add snaps to attach the sundae dish.

Sundae Dish: I sewed light blue felt and blue tinted vinyl together along the curve of the bowl to make a pocket, then I sewed across the top of the vinyl to make that edge match the others (and make it feel less sharp.) I sewed three snaps along the back so the bowl can come off, but you could just sew it to the page.

Ice Cream Scoops: I sewed the two sides of each scoop together with some scrap felt in the middle to give it some thickness. You could use batting, but I was in the car and that was what I had!

Sundae Toppings: I sewed the toppings the same way that I sewed the ice cream scoops, except I decorated the front pieces first.

Strawberry: I sewed the sprinkle bugle beads to the strawberry topping.

Pineapple: I sewed down little pie wedge shapes of cream felt to make pineapple chunks.

Chocolate: I sewed the nut beads to the chocolate sauce.

Whipped Cream: I sewed the cherry felt ball on to one side of the whipped cream, making sure I really secured it down with a bunch of stitches. You could use a circle of felt stuffed with some batting instead of the felted ball. I then sewed the two sides together.

Ice Cream Tub: I sewed the pink top piece to the main white tub piece, overlapping them a bit. I sewed on the lettering and the oval ice cream colors. (Sew the white of the oval on first, then layer the pink and brown over it so they line up.) I then sewed the ice cream tub on the the page along the sides and bottom to make a pocket to hold everything.

Sprinkle Jar: The sprinkle jar is a pocket for the spoon to go into. The front of the pocket is made of two layers of clear vinyl with sprinkle beads sewn inside. I started by sewing the light blue background to the page. Then I folded my vinyl in half and started sewing around the edges. With one side still unsewn, I filled the vinyl pouch with beads then sewed it shut. I placed it over the blue background with the smooth folded edge up, and sewed the sides and bottom down, making the pocket.

Spoons: The spoons are just two layers of felt sewn together with some decorative back stitching on the bowl to give it depth. I also sewed on the sprinkle beads to the spoon that goes in the sprinkle jar.

This page sewed up very quickly! It was a good project for the car, though I did all the beading in the hotel and at home so I wouldn’t spill. You could definitely mix and match the elements from the ice cream parlor page and this one. I just scaled the ice cream a bit larger for this page.

Jax enjoys it, but I knew he would – all of the food pages are big hits for him! The first thing he did was take all the parts and put them in and out of the ice cream tub. Then it was time for a tower of ice cream! And, don’t try to separate him from that sprinkle spoon! It is a prized possession!


Enjoy! If you make one of my pages, I’d love to see… Email me a photo or post it on the Facebook page.

Camping Quiet Book Page

Camping! S’mores! Lanterns!

This page is sponsored by American Felt and Craft, who provided the felt and crinkle material. When AF&C reached out to me about providing felt for some of my designs, I knew it was meant to be… The next page I had planned to make was a camping one, and the gorgeous earthy colors available in wool blend felt were so perfect for it. And crinkle fabric to make my camp fire crackle? Yes, please! Read more about American Felt and Craft here. Read more about my thoughts on wool blend felt here.)

.

Let’s Go Camping!

This page is a lot of fun to play with! There is a zipper on the sleeping bag – something Jax needs to practice. Inside is a little bendable mini-Jax to play with! There is a cave hiding a cute baby bear, a lantern that lights up when you press on it, hot cocoa with marshmallows, a crackling camp fire and all the fixings to make s’mores.

What I used:

The Background: I started with two sheets of cilantro felt and cut them away at the top to make the hills. You need to make sure the two sides line up where they will be sewn together at the center seam. I placed strips of wild blueberry felt behind the cilantro to make the night sky. I sewed the hills to the sky. I then sewed the table pieces to each page, making sure they lined up where the center page seam will be as well. I sewed the three pine trees down before starting on the cave.

The Cave: I sewed the cave interior down in the corner of the page, then sewed down the cave front, leaving the arch of the cave entrance open (see above photo.) I made the cave door by sewing the two door pieces together, then sewed it down into a flap along the top.

The Baby Bear: I first sewed the two sides of each far leg together, then pinned them between the two sides of the main bear body. I sewed a French knot eye with a little stitch in the corner on each side of the bear’s face. I stitched the bear together around the outside, then satin stitched his nose.

The Sleeping Bag: I pinned down the sleeping bag interior piece on top of one side of the upside-down zipper, folding the extra zipper tape under. I stitched along the edge of the felt, securing that side of the zipper. I then sandwiched the two outer sleeping bag pieces around the other side of the zipper (as shown above) and sewed along the zipper. To finish the sleeping bag, I sewed the two outer pieces together where the above photo is marked yellow, then sewed the outer pieces to the interior pieces (and the actual page) where the photo is marked green.

The Child: I made my child a mini Jax. I’ve included a drawing of girl hair in my pattern. I started by making an armature out of pipe cleaners. See the below photos for how I did mine. I laid the pipe cleaners on top of the pattern as I made it to be sure it would fit. (when working with the pipe cleaners, always fold over the ends so there aren’t any sharp pokies to hurt your little one!)

I started sewing the felt with his head. I embroidered his face (French knot eyes, a small stitch for the nose and a back stitch smile) then sewed the front and back head pieces on to the armature. I then sewed the front and back hair pieces on and added some stitches to show the hair. I sewed the hands on, then sewed the pajamas on. I added back stitching to the neck and chest.

The Camp Fire: For each of the three camp fire flames, I pinned the pattern piece on to two pieces of felt layered around a bit of the crinkle fabric, then cut through all 3 layers. Then I sewed around the outside of each. I sewed the two logs down to the page in an X, and sewed on the log ends with back stitched circles. I layered the flames together and sewed them to the logs along the bottom. The crinkle material gives the flames enough stability that the camp fire can stick up when the page is laid flat.

The Lantern: The body of the lantern is drawn to wrap around the LED light I bought. You’ll have to modify it if you use a different light. The light is a keychain, so I pulled off both metal rings that came on it. I started by sewing the bottom of the lantern glass to the lantern body. Then I laid the light in place on the page and sewed the lantern body down over it on the left and right sides (so that the bulb of the LED sticks up into the window.) Leave the bottom open, but sew a snap on to hold the light in. This way, you can get it out to change the battery. I sewed the top of the lantern on, then finished it by back stitching the sides of the glass.

The S’mores:

Marshmallows: I folded my square of felt into quarters, then stitched it into a tube as shown in the photo above.  I sewed the inner tube, sewed the outer tube, then around the bottom edge to sew the two tubes together. You could cut your felt in half first then sew one tube inside the other.

Graham Crackers: The crackers are stitched on both sides with a dashed line down the center, then little + stitches to make the “holes”. I then stitched the two sides together. I made two, but you could make 4 if you prefer.

Chocolate: The tops of the chocolate had 4 rectangles sewn on before I stitched the front and back together.

The Bowls: I simply sewed the folded bowl shapes and sewed them to the page along the curves.

The Sticks: The sticks each have a pipe cleaner insider them. I folded the extra length back at the top, then out to make the branch. I folded the extra bit of branch back to the main stick and twisted it the secure it. I then sewed the felt over the pipe cleaners. I added a loop of felt to the table to hold the sticks.

The Hot Cocoa: I started by sewing three mini pom poms to the hot cocoa. Make sure they are on there good and secure! That’s the first thing Jax tried to pull off! I sewed the top of the hot cocoa to the mug back. I stitched the handle together, then layered it between the front and back of the mug as I sewed them together. I added a snap to hold the mug on the table.

Jax is having a great time with this page. I think his favorite item is the hot cocoa and marshmallows. He loves the mini Jax, but can’t work the zipper yet. It will be good practice for him.


The Giveaway! I am super excited to announce that we’ve teamed up with AF&C to host a giveaway featuring many of the supplies needed to complete this page! One winner will receive the felt and crinkle material needed for the camping page, plus a mini LED light and a piece of clear vinyl for the lantern from my stash.

PLUS, two more winners will each receive a mini LED light.

Ready to enter this great giveaway?

a Rafflecopter giveaway


Reader Gallery – Baking Cupcakes

My original page.

I have some super creative readers! I love when you guys take my patterns and change them, embellish them or completely twist them into something unique and new!

Here is a version of my cupcake page sewn by Jaclyn S.

My goal was to make this page even more interactive by making the eggs open with the yoke inside and I liked the idea of being able to take the butter out of the wrapper. I used a lot of clear vinyl which a got from clear pencil bags from target. I didn’t want to take the extra time to embroider the ingredients so I just printed it out, colored it and sewed it behind the vinyl. Super easy! I wanted to add the cupcake stand page because I wanted a place to show off the cupcakes after they had been decorated! (See more here.)


Karima did something completely unique – she turned the page into a playmat, also added my watermelon, tea and mug.


And Courtney and Victoria changed the colors and trims which gave the page a whole new look!


City Quiet Book Page

City Quiet Book Page

The is page is a fun way to use up all those scraps of felt you generate while making a quiet book. Plus, it is a lot of fun to play with! You can match the vehicles to the buildings they go with, drive on the roads or “park” them for storage by tucking the buttons on the back of the cars into the road’s channel.

This pattern is very crazy with a million tiny pieces. I cut all of the smallest elements by hand, but I went back and drew most of them into the pattern to help show the shapes you need.

What I Used: the pattern, green background felt, two 9″ x 9″ squares of stiff black felt (plus scraps), felt in a zillion colors (I used my scraps!), a scrap of vinyl, a scrap of yellow ribbon and buttons.

I started by pinning the road pattern onto my green 9″ x 9″ background and basting all around it to mark the road. Then I sewed the main elements to the green felt.

Ice Cream Parlor: I sewed down the building and the roof. I made purple stripes on the roof with long stitches, then held them secure with some pink back stitching. I sewed the windows and doors down and outlined them. I sewed on the ice cream and outlined the cone. I did crossing diagonal stitches for the waffle texture.

House: I sewed down the building and roof. I tacked on the windows at the corners then used 4 strands of white thread to make +’s for the panes. I sewed on the front steps and the door, then cut out green bush shapes and did pink French knots. I sewed down the pool and cut a little scrap for the diving board. I used gray thread to stitch on a ladder and the diving board attachments. I sewed down the umbrella and table and added stitched on legs and fold lines on the umbrella. I sewed on the tree and added the tree house. I sewed a line of back stitch to show the roof line, and made several stitches across the tree trunk for a ladder.

Tip: Worried your French knots won’t hold up to play? Practice until you can make then nice and tight, and try adding a drop of Fray Check to then – using a toothpick to apply it.

School: I started by sewing the word SCHOOL to the sign strip. I sewed down the building and the sign strip. I sewed on the windows and door, then sewed a line down the center of the door. I sewed on the bell and made a French knot at the bottom. I cut out a pine tree shape and sewed it to the side of the building. I stitched on some playground equipment with thread, using tine scraps of red felt for the slide and the triangle base of the seesaw.

Market: I sewed on the building and the roof/sign base. I sewed on all the little fruits and veggies, using French knots for the peas and grapes. I sewed the door on and added a line down the middle. I stitched the grocery cart and wove some stitches in a basket weave pattern inside of it. The wheels are more knots. I sewed on the brown produce bins and used French knots to make the oranges and apples.

Fire Station: I sewed down the building and sewed on the garage door, windows and door. I added stripes to the garage door to show the panels. I sewed the words FIRE STATION 2 to the sign, as well as the fire emblem, then sewed it down.


Apartment Building: I sewed down the building, door and windows, leaving room between the two rows of windows for the balcony pocket. I decorated with balcony before sewing it on – little maroon rectangles to make planter boxes and green French knot plants. I sewed the awning on only along the curved top, and added lines of stitching for support poles. I used more scraps and French knots to make the planter pots on either side of the door.

I created the flames as a little flap sewn to the top of the building. I sewed the yellow flames to the orange, and I sewed two windows to the grey flame backing (so they line up with the windows on the building when the flap is down.) Then I sewed the two sides together. I sewed the flat side of the flap to the top of the building, flame side up. Then I was able to tuck it in to the balcony to hide it.


Roads: I basted a square of stiff black felt (it’s this, but only $1.99 at the store) to the back of my green background. Pins probably wouldn’t work well, but paper clips or binder clips might. Using green thread, I sewed the shape of my roads and pulled out the basing (see photo above left.) I hand stitched, but a machine would work well. I sewed a second square of stiff black felt to the back, going through all three layers. (This is why clips might save you time! Since this 9″ square will ultimately be sewn to your full page, how you bind the layers together at this point doesn’t really matter. I machine sewed over all this when I constructed the page.) Then, with my micro-tip scissors, I cut away the green layer and the top black layer inside the roads. It then looked like the photo above right.

At this point, all the blocks in the city will flop around and definitely not hold the cars in place. You need to add some stitching through all three layers, about a 1/4″ from the edges of the roads. I sewed all of the elements below through all three layers to do some of that, then stitched little flowers along the road everywhere else to hold it in place.

Other Elements:

At the end of the road below the market, I sewed on the gas station base and pole. I sewed the word GAS to the sign, then sewed that down. I sewed on the pumps, making a few tiny stitches for the details and hoses.

Below the road under the school, I sewed on the pond. I cut a tiny scrap of yellow felt into a duck shape, using yellow thread to attach it and cinch in his neck. I stitched in a triangle shape for his beak. I added green stitches with little brown tops to make cattails around the pond. I sewed on a picnic table and basket, as well as a grill. I added black stripes to the grill and a brown French knot burger. I sewed on the traffic light and made the lights with French knots and stitched a base.

Next to the apartment building, I sewed down a tree and added French knot apples. The produce truck can visit and pretend to load up on apples.

The flower stems are made from three green stitches that fan out from the bottom point. I topped the center stitch with either a French knot or a daisy loop flower. Bring your needle up through the felt at the base of your petal, then down through the same hole – but don’t pull it all the way through.  Where the top of the petal will be, come up through the felt and run the needle through the loop you left. Pull tight and go back down through the felt a little ways away from your last hole, making a tiny stitch to hold the petal loop in place.

Vehicles:

School Bus: On the front piece I sewed the black stripe, the door, the windows and the wheels. (Some of the wheels are sewn on with a simple “x” and others are a French knot with an “x” over top.) I  sewed the two sides together and added a button to the back. I chose to go through both sides of the vehicle with my button for strength, but it might not be necessary.

Car: Super simple! I sewed the windows and wheels to the front, sewed the front to the back and sewed on a button.

Ice Cream Truck: I sewed the windows to the front then sewed on the ice cream cone. I embroidered some ice creams in the window. The cones are three little stitches in a triangle shape with French knot ice creams and a horizontal stitch below the knots to make the part of the ice cream that overhangs the cone. The popsicle is just some vertical stitches. I sewed on the wheels, sewed the back and front together and added a button.

Fire Engine: I sewed the windows, flame design, “2”, wheels and an instrument panel (with a knot and a couple stitches for decoration) to the front. I took a bit of yellow ribbon and wrapped a tiny scrap of felt around one end, sewing it in place. I sewed the other end of the ribbon to the front piece and sewed a red button on top. I made sure my button wasn’t flush down against the truck – you need room to wrap the hose around under it for storage. I took a scrap of clear vinyl and stitched a yellow ladder to it, leaving some extra vinyl at the bottom with a tiny hole cut in it. I took the tiniest button I had (1/4″ I believe) and sewed it to the back of the truck through the hole in the ladder piece. That let the ladder pivot up and down. I sewed the back and front together and added a button to the back.

Produce Truck: I sewed the windows and wheel tot he front then sewed the front and back together. I placed the two truck be pieces on either side of the truck and sewed them into a pocket along the sides and bottom. I added a button to the back. I sewed French knot apples to the front of the apple pile, then sewed the front and back together.

Phew! All done! I’d originally hoped I could have the vehicles stay buttoned to the page and you just slide them around. But, despite the stiff felt, the cars pop out when you go around corners. My first car had a large 1″ button that did stay in much better than these small ones, but it still pulled out easily. I decided that I’d use smaller buttons that didn’t detract from the vehicles, and I’d use the channels to “park” then when storing the page. Jax likes to have those tiny cars in his little hands anyway, so he’s happy!

For more free quiet book patterns, visit my quiet book page. Stop by the Facebook page with requests or photos of pages you’ve made, and visit my support page to help me run this site.

A camping page is already underway! Previews are being posted on Instagram and Facebook.

Wool Blend Felt vs Polyester Felt

I’m almost done the city quiet book page that I’ve been creating with my scraps of recycled polyester felt. But for my next quiet book page, I’ll be using beautiful wool blend felt provided by our new sponsor, American Felt and Craft (more on that here.) I’ve never worked with it before, and I’m really excited to try!

I thought it might be nice to compare the wool blend to some craft store felt made from recycled plastic bottles. This is the kind of felt I have used up until this point.

The felts are about the same thickness, but the wool blend is denser.

When you feel the two felts, they are about the same thickness, but you can tell right away the wool is much denser. The polyester definitely has a “right” and “wrong” side – the “wrong” side is super scratchy! The wool blend almost feels just as soft on the back as the front. It’s only a tiny bit rougher than the front.

After pulling hard on the corners of each felt sheet.

In the strength department, the wool blend felt wins hands down. I pulled hard on the corners of each of the felt sheets. The polyester felt stretched and thinned. It got fuzzy and I probably could have ripped it if I kept at it. The wool barely stretched at all.

I tried to smooth and stretch both of the felts back into the original shapes. The wool blend obeyed, but the polyester got fuzzier and stayed mostly stretched.

The above photo also shows how thin the polyester felt is. You can see right through it. The wool is nice and dense, which makes all the colors very rich.

  
wool vs polyester

I’m really looking forward to trying it out! Have you worked with wool felt? What are your thoughts? I’m wonder if it will wear my scissors down fast than the acrylic and polyester felts do. I should finish the city page tomorrow, then I’ll get to move on to the wool camping page! (For progress photos of my pages, join the Facebook page or follow me on Instagram at username iolstephanie.)