Let’s all go on a shopping spree together at Target on September 13th! Missoni’s Target-exclusive collection will be released, and I’m already in love!
I’ll take the sweaters, rain boots, tote, carry-on… Oh, and that amazing bicycle!
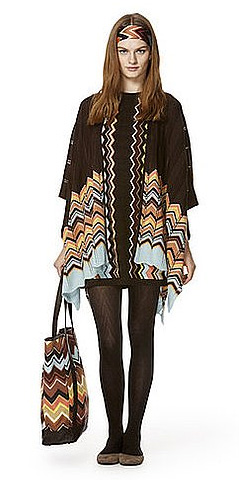
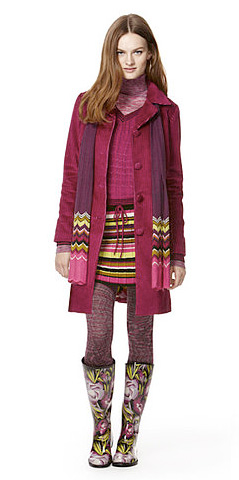
Let’s all go on a shopping spree together at Target on September 13th! Missoni’s Target-exclusive collection will be released, and I’m already in love!
I’ll take the sweaters, rain boots, tote, carry-on… Oh, and that amazing bicycle!


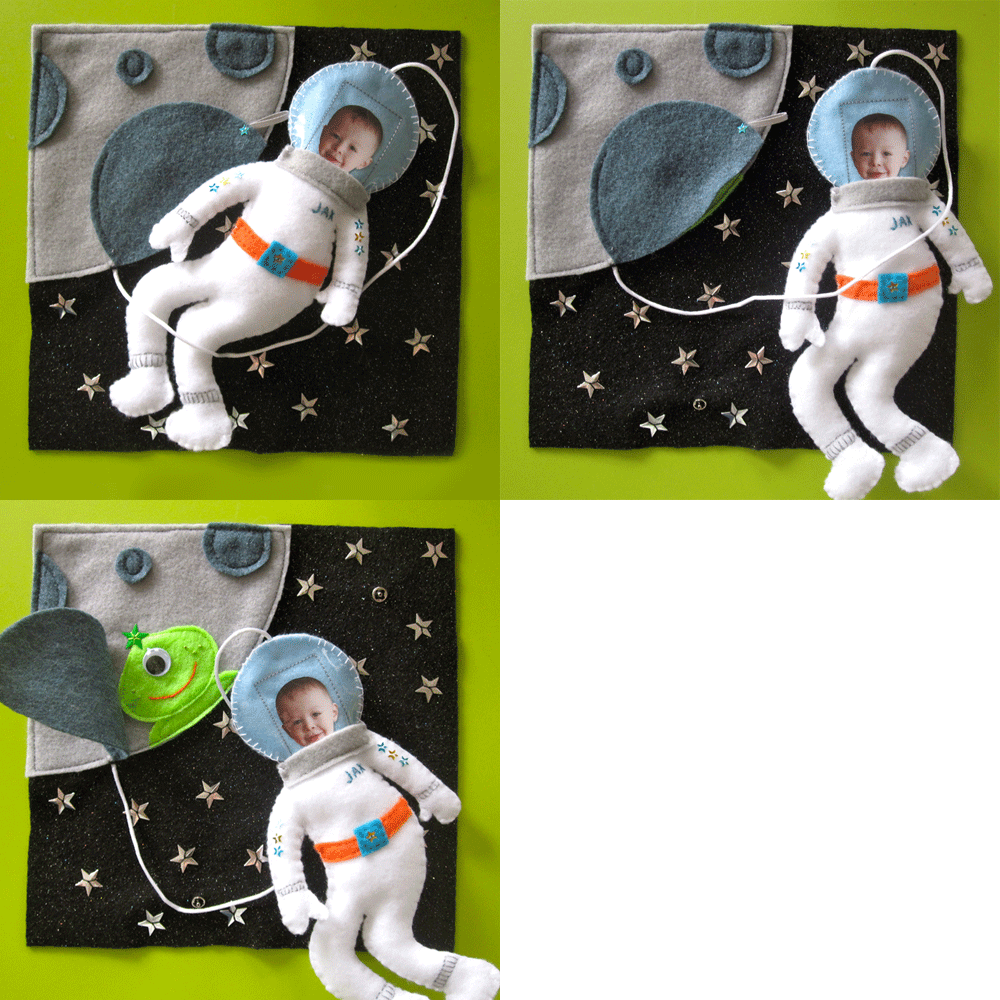
Here is the second space page in Jax’s quiet book. I think it came out super cute! I created a pattern as I worked on this page, and I’m sharing it with you all for your personal use. If you use the pattern, I’d love to see your version! Link back to me or leave a comment!
This page has a peek-a-boo alien and an astronaut that can snap on and off the page. The face has a spot for a 1.25″ x 1.5″ face photo. I plan to make my book pretty thick, with a 2″ spine and possibly a zippered cover. You can omit the batting/stuffing in the astronaut and just sew the two sides together if you want yours thinner.
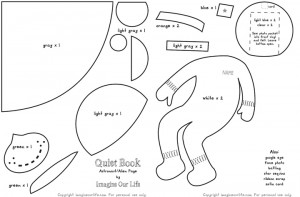 I did use star sequins in this design, but you can leave them out or replace them with felt or embroidery if you have a young baby who puts things in their mouth. Whatever works best for your situation! My other materials were: felt sheets (black glitter, dark gray, light gray, lime green, white, turquoise and light blue), matching threads, batting/stuffing, clear vinyl to make the helmet shiny, white satin cord from my beading stash and a scrap of ribbon to use on the peek-a-boo door.
Once I cut everything you, I machine-sewed the craters to the moon, sewing only the left side of the large on to make a hinge (I added a ribbon loop and sequins to make a handle.) I used a stem stitch in orange to sew the alien’s mouth, French knots for freckles and a self-stick google eye. I machine-sewed the alien down behind the door and sewed the moon to the backdrop. You can do it easier by just sewing the door on last, though it wasn’t any trouble for me. I left a small gap under the moon and hand stitched one knotted end of the satin cord underneath. I added a star hand-sewn to the alien’s head.
Next I decorated the two sides of the astronaut. Both got straight stitched ribbing at the wrists and ankles and an orange belt. The front got a belt buckle, Jax’s name in stem stitch and some stars. I did a line of stitching on each side at the neck to attach the blue helmet. I placed a helmet vinyl piece over the front and used the sewing machine to sew a rectangle with an open bottom to make a photo pocket. You can use lighter thread if you want to hide yours. The the neck piece was hand-stitched on the bottom only to make a flap to hold the photo in. The back of the astronaut’s helmet got the vinyl attached at the neck with stitching on both the top and bottom of the neck piece. With one end of the cord on the wrong side, I sewed a snap to the back of the helmet. Another snap went on one foot. Then I sewed him all together, filled with batting, with a blanket stitch.
The backdrop got hand-sewn star sequins and the other half of the snaps. Jax cracks up when we open the peek-a-boo window, and he says “Baby!” when he sees the photo. Hopefully soon he will recognize it is him.
Here are the two space pages together. I could have lined up the craters, I decided I don’t mind since there will be space between the pages for the binder rings. What do you think? I have a zillion more ideas I plan to try to make before our plane ride to California in November, so stop back for more!
Link Party: The Idea Room
Just barely making it in time for Sunday Souvenir. The long weekend threw me off. So a simple post this time, of one of my favorite childhood photos. It is of my grandpa and I. How I loved to curl up on his lap and use his tummy as a pillow! I adored visiting them in Iowa. My grandpa will be 95 next month.
Do you have any photos from your childhood that give you the warm fuzzies every time you look at them?
Leave a comment if write a Sunday Souvenir and you’d like your link to be added!
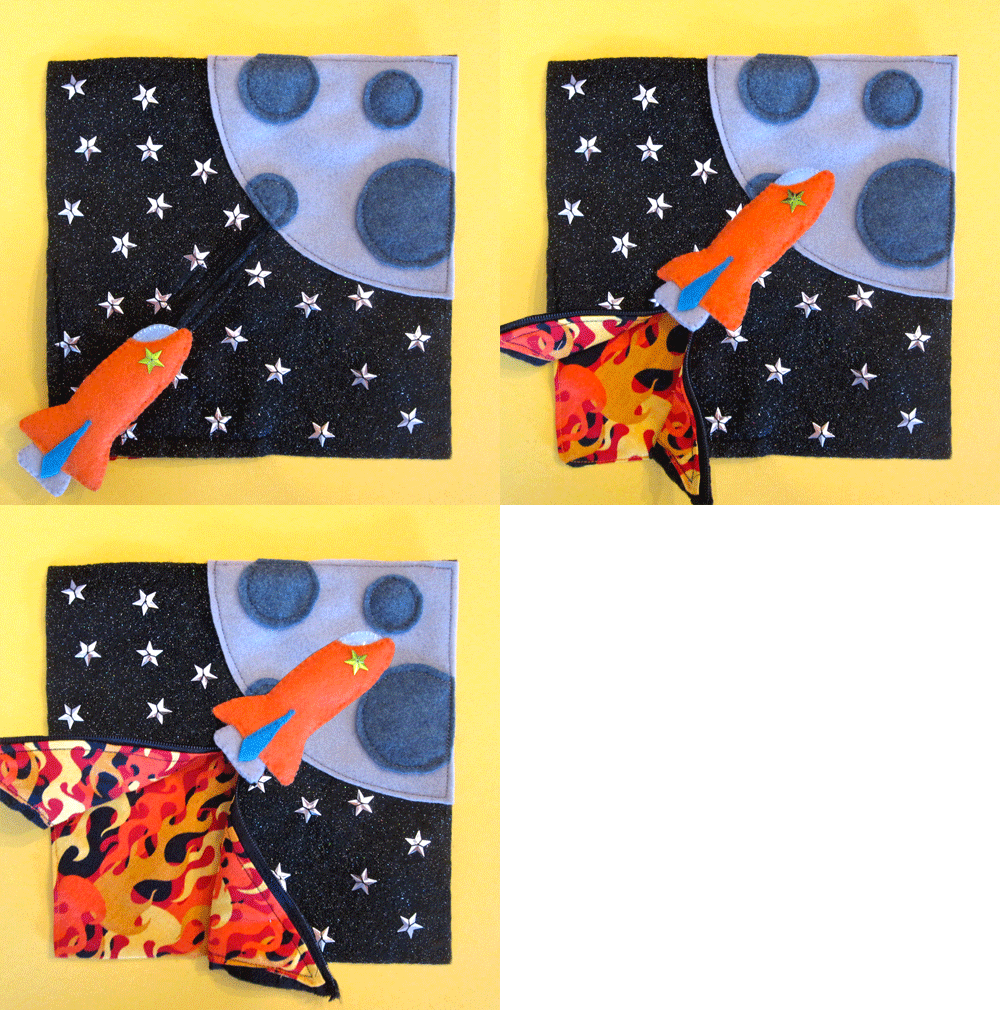
I have the first page of Jax’s Quiet Book finished! This page was inspired by Handmade by Jill’s rocket page and the fact that Jax’s grandpa was a rocket scientist (astrophysicist.) I created a pattern as I worked on this page, and I’m sharing it with you all for your personal use. If you use the pattern, I’d love to see it! Link back to me or leave a comment!
The page is designed to learn how to work zippers. There is a hand-sewn felt rocket ship attached to a zipper. When the rocket soars towards outer space, the zipper opens to reveal flames.
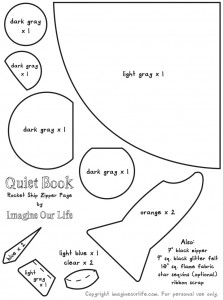 I did use star sequins in this design, but you can leave them out or replace them with felt or embroidery if you have a young baby who puts things in their mouth. Whatever works best for your situation! My other materials were: felt sheets (black glitter, dark gray, light gray, orange, turquoise and light blue), matching threads, batting/stuffing, a scrap of clear vinyl to make the window shiny, 7″ black zipper and a scrap of ribbon ton attach the rocket to the zipper pull.
It’s all pretty self-explanatory from the pattern and photos, but the flames are a little tricky. Here’s what I did… I sewed the rocket together with some batting to make it dimensional. I decorated the moon with craters. To add the zipper, I pinned it face down onto the back of my black felt then sewed it with a zipper foot. On the front of the page, cut the felt open up the center of the zipper to make the opening. Sew down your decorated moon to cover the top of the zipper opening.
For the flames: Fold the 10″ square into a triangle, right sides facing, press and sew (leaving a hole to turn it right-side-out.) Note that my square was a little too small so my seam allowance is tiny and it came out wavy. Learn from my errors! Turn the triangle right-side-out and press the hole shut. Top stitch all the way around, closing the hole. The triangle will get folded like origami so that the two outer points meet down at the bottom point when the zipper is closed. I pressed mine like this before moving on. Unzip your zipper and pin one side-corner of the triangle to the back side of a lower corner of the page, leaving room so you don’t sew through the zipper. Repeat for the other side. You will have to fold up the page a bit to get both sides pinned, and there will be an inch or so crossing the zipper that can’t be pinned/sewed. It will be hidden behind your page once you put on a backing or another page (unless your zipper goes up really high! I tested mine with the pins before sewing.) Sew each side separately, then you’re done!
Jax is already really excited about the page, but he can’t practice unzipping until I put it into the book. I am halfway done the facing page – a spaceman – so check back this week for that free pattern!
What do you think of my first page?
It’s been another crazy week here. Only one day with a sitter watching Jax, so working has been challenging. And let’s not even talk about chores! Are you ready for the weekend?
I have a new obsession! Quiet books! Quiet books are fabric books full of fun surprises and activities to keep toddlers and young children *quietly* entertained. With a 5+ hour plane flight coming up in November, this might be a great project! Any sewing fans want to create some pages for me? I have too many ideas and too little time for them all!
I am 100% doing a robot and space ship thanks to ideas by Handmade by Jill. I love the glitter pouch here, and the idea of attaching an animal with a ribbon that baby can velcro on and off. Cupcakes and an oven! Simple and sweet, bound with grommets. Check out my Pinterest board for more inspiration.
I think I’ll make one with 9″ x 9″ pages (felt comes in 9″ x 12″ sheets.) Felt pages can be exactly that, fabric pages will need a .5″ seam allowance all around. Button holes for binder rings once I sew two pages together. Then a fabric cover with handles and a closure strap.
If you’d like to create a page for Jax, let me know! This is going to be a fun project that can use sheets of felt and fat quarters of fabric.
Have you made a quiet book before? I’d love to see!
Edited to add: I’ve been busy! Check out all my Quiet Book pages with free patterns here!
How much do you spend on toddler shoes? I always want to spend the least amount possible when it comes to clothes for Jax – he grows out of them so fast! But, is it a good idea to go cheap when it comes to shoes?
I am just starting to build a fall wardrobe for Jax (obviously nothing from last year when he was 6 – 10 months old fits him now) and got lucky with some good shoes from the thrift store for only $2.50 a pair. When looking at new shoes in the stores, there are certainly cheaper options for $15 – $20, but for little feet still getting used to walking and running, are they a good idea? You want them to be built in a way that will support their feet in the healthiest way possible. But I don’t want to spent $46 dollars!
I was in Nordstroms with Jax (we park there at the mall because they have the best bathroom with a nursing room) and paused to check out the sale rack of shoes. I saw these green sneakers a size up from where he is now and couldn’t put them down. I took Jax out of the carrier and let him run around in them. They stay on but with tons of room and actually fit his thick feet. And: So. Stinking. Cute. And $20 off! I always check online on my phone before buying things, and everyone had them for $45 or $46.
What ultimately made it impossible for me to put them back on the shelf was the fact that Jax’s Halloween costume will be head-to-toe green. And I plan to make the top half a hoodie he can wear as a coat past Halloween. I’m so in love with them! It makes the fact that his hand-me-down orange sneakers are getting too small a little easier to bear.
So, while it felt painful to buy shoes for $26, I do realize they are a great deal, really good for his feet, and perfect for both his costume and wearing every day. But I’m cheap and don’t like to spend that much on *my* shoes. When I do splurge, I end up with good shoes that last a long time. I need to find that balance between quality and value.
What do you think, dear internet? How much are you willing to spend on your little ones’ shoes? Any favorite pairs?
We are making weekly trips to the thrift store to start building a library for Jax. I plan to make some sort of reading corner for him, most likely using picture rails or spice racks from Ikea. (Just need to convince my husband to make the long drive there!)
Here is what we got for $7.50:
Five small Winnie-The-Pooh books, I Spy Little Hearts
, Elmer’s Colors
, Clarence the Curious Calf (that squeaks!) and You Can Drive an Automobile.
We got lucky with his clothing size this time. We got: an OshKosh train engineer hat and button down, Gymboree t-shirt and Cherokee cords (in gray!)
While I was there, I showed the shopkeeper a photo of how his kitchen turned out. She was shocked at the transformation. She took my contact information in case the oven door should turn up, but it’s unlikely.
I’ve had my Canon Rebel xti for years, but I still don’t understand how everything works. I am finally taking the time to read a book about photography basics and how to use my specific camera. I really need to take a family portrait (Jax just keeps growing!) but hiring someone is not in the budget.
I’ve made it halfway through my book but haven’t gotten a chance to practice much. I snapped about 20 quick shots on semi-auto to test out my remote control shutter. There were a couple keepers, but the toddler was in maniac mode. I only got a couple minutes to practice setting my aperture to create a nice depth-of-field before Jax demanded my attention.
Have you taught yourself to use an SLR camera? What resources did you use? I need tips!
And, am I totally crazy to try to DIY our family photos? (It’s probably a good thing I am amazing in Photoshop, hah!) Because, really, unless a photographer can donate their services, the only family portraits we’ll have will be the ones I take.
Cool 3D robot wall art. Robot wallpaper. Baby Bolts retro robot bodysuit. French Bull 8-Inch Melamine Plates, robot kids, set of 4. Retro 60’s Style robot table lamp. Robot Matryoshka dolls
. Wooden stacking robots
.
I drew this picture when I was 5 of a mug given to me by an elderly relative. It is still one of my favorite mugs! I was sooo proud of this drawing and thought it looked just like the mug’s design. My dad must have thought I did pretty well, since he snapped a photo of it.
I remember starting to understand drawing what you see and not what you think you see while making this. I’ve always loved to draw!
This drawing I did in high school when we had a week off of school due to crazy ice storms. I set up the still life on the table and spent many many hours a day drawing my oboe, the sheet music and the table cloth. We had this drawing scanned and printed so we’d have copies that would last. I’m not sure where the original is, perhaps downstairs in my portfolios. I need to frame it or one of the copies at some point.
Leave a comment if write a Sunday Souvenir and you’d like your link to be added!
 We’ve had a gloomy, rainy day today as we wait for the hurricane to make its way up the east coast. Jax got to play with his buddy a bit before the rain starting picking up.
We also passed some time by coloring cards to send to his relatives. I made some envelopes for them then introduced Jax to stickers. He loved them!
Hopefully the cards will bring some cheer when they arrive!