Thrift Store Gems

We found mostly books this week at the thrift store. The toy shelves were cleaned out and there wasn’t much in Jax’s size on the clothes racks. But, the books we got are great!

For just under $11, here’s what we got:

All the books were 10% of the cover price. So the big $10 hardback was $1. We found: Charlie and Lola’s Numbers, Days on the Farm and Spotty Frogs’s First Number Fun with little frog beads to count. We got Toes, Ears, & Nose! A Lift-the-Flap Book and Where is Baby’s Mommy? so we now have all three from Baby’s Box of Fun. There was also a snail book and Nelly & Caesar – Touch,Taste, and Other Feelings.

I got Jax a fleece top for $2.50. He has long sleeve tees and thermals, but is lacking really warm tops. There were some tie dye iron-on letters in the craft section that could be used on a quiet book page. There was a three-pack of learning cards for $1.50. They are mostly too advanced for Jax, but I thought they’d be fun on the trip. They are small for packing and I won’t mind if some get lost because they were so inexpensive. Oh, and we got a pair of socks, hah.

Jax is really excited about his new books. It was hard to get a photo because he kept grabbing them!

Life Via Instagram

Happy November! We made it through Halloween and now we are just days away from Jax’s first plane flight. Yikes!

Here is a peek at our October via Instagram…

How To Sew Quiet Book Pages

Here is a little tutorial on how I sew up my final quiet book pages. My designs are 9″ x 9″ on a felt background. I sew my final pages using 9″ x 12″ felt sheets – white for the front and colored or patterned for the back. If your pages are a different size you’ll have to modify accordingly.

  1.  Pin your design to the white felt. I put mine close to the right edge but leave about a half inch.
  2. Zigzag stitch around all four sides. If you have dangly bits, make sure you hold them out of the way!
  3. On the reverse side, pin on the background (wrong sides facing.)
  4. Sew all the way around.
  5. On the front, I sew a line 1.75″ from the left edge. I use a hole on my machine as my guide.
  6. Sew another line just inside of it. I use my presser foot as my guide.
  7. Sew a line just to the side of the far left seam like in step 6.
  8. Gather what you need to put in grommets. I made a template so all of my pages would match up.
  9. Mark your holes. Place them in the channel you made for strength.
  10. Cut out holes as directed on your grommet package.
  11. Put in your grommets as directed on the package.
  12. All done!

When I have a 2-page spread, I sew the right-hand page with steps 1 – 4. Sew the left-hand page like steps 1 – 4 but align everything to the left of the page instead of the right. Place the pages together, right sides facing. Sew over the far left seam, then make the same seams as in steps 5 – 7. Continue on to make your grommets. You’ll now have a separate page you can take out of the book and the two halves will always stay together!

I hope this helps! I’ll post about my cover soon… I still have to make it!

Jax’s Homemade Brobee (Little Green Monster) Costume

Happy Halloween!

I’m so glad I was able to finish sewing Jax’s Halloween costume in time for trick-or-treating! This will be his first year for it, but I don’t think we’ll go to too many houses. I think he’ll enjoy handing out candy.

This is probably the last year I get to choose his costume. I’ve wanted to sew him a Brobee costume since last year, but it was just too much effort for a baby that wasn’t going trick-or-treating. I know Yo Gabba Gabba is a little obscure, but everyone recognizes that he is dressed as a “little green monster” just fine!

When I started planning the costume, I knew I needed to have a base pattern to work with. I originally was looking at long pajama patterns, but when I figured out how much work the costume would be, I wanted to make something he could wear beyond Halloween. So I ended up going with a coat and pants. I went to Joann’s at naptime with Jax in the Gemini and found this great Burda pattern. I made the center look, in size 2T, but left off the embelishments.

The outside is made with fleece that I sewed darker green stripes on before sewing it together. I lined the coat in green flannel. I added the horns in red fleece and sewed the eyes and mouth out of felt. The unibrow is marabou sewn to a strip of hook & loop tape so I can remove it to put the coat in the washer. I modified the hood by adding a casing with elastic around Jax’s face to keep it up. The sleeves have to be cuffed, pants are hemmed up 3″ and I cinched in the elastic waist for now as he is not a 2T yet, but he has room to grow into it!

Yesterday we joined the neighborhood costume contest and parade in the local park. Jax won 3rd prize and was thrilled that his prize involved a new pack of crayons!

Sunday Souvenir – Photos in the Mail

I’ve had a lot of photos this month, but mostly because I don’t have much else of my mother’s. This week I got a big pack of photos in the mail from my aunt to split between my brother and I. Tonight I flipped through them and sent my brother a few over mms. I’m looking forward to looking at them all with him after vacation.

I don’t have a lot of photos from the time after my mom died (age 5) and when I first got a camera (middle school?) I don’t think my dad was big into taking pictures at the time. There are photos of me from this period and I was so excited to see them! I’m not sure that I’ve seen many (or any) photos of me missing teeth! I’ll share more when I take a closer look at what all she sent.

Most of the photos of my mom are with my brother, as he is 6 years older and my mom got cancer when I was a baby/toddler. Can I say how much I love, love, love the nursing shot of her? The photo of her and my brother in the snow is so sweet. That will be me and Jax this winter. And my dad and brother passed out together. Classic.

Leave a comment if write a Sunday Souvenir and you’d like your link to be added!

Link-o-rama!

It’s Friday! And Halloween weekend is beginning! Are you all ready? I just finished up the pants for Jax’s Halloween costume today. Hopefully I’ll get some good photos in the neighborhood Halloween parade.

What are your little ones dressing up as?

Photo via Heres2uMrsRobinson on Etsy

Here are some links for you:

Happy Halloween!


Brush Your Teeth Quiet Book Page

A while back I picked up a beat-up fabric book at the thrift store for 75 cents because it had a great 5.5″ circular mirror in it. I knew I wanted to cut that out and add it to Jax’s quiet book. Since he is a huge fan of brushing his teeth (he signs asking to do it, then hums the song I made up for him to brush to) I had to do a sink scene!


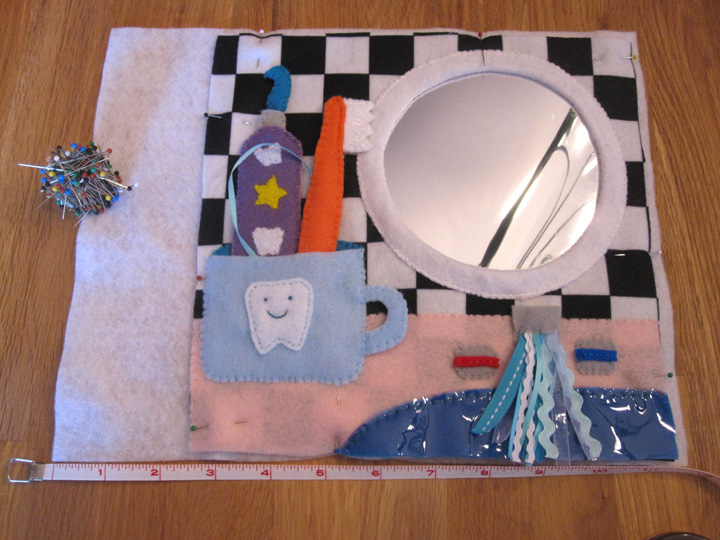
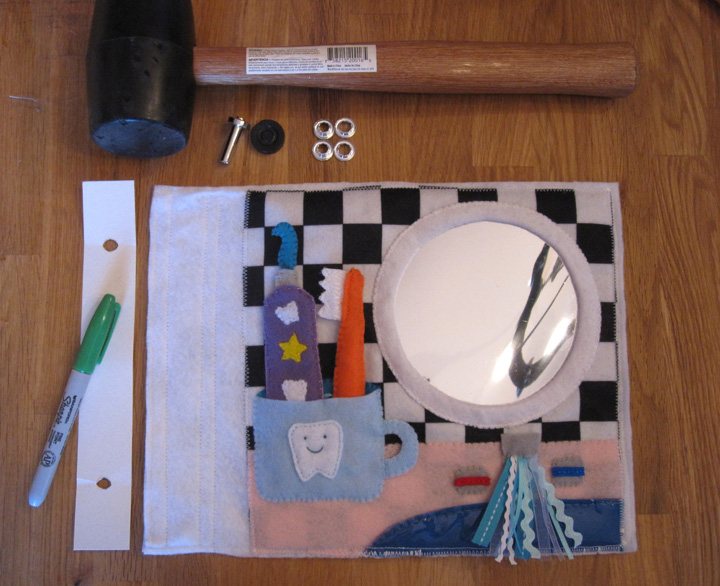
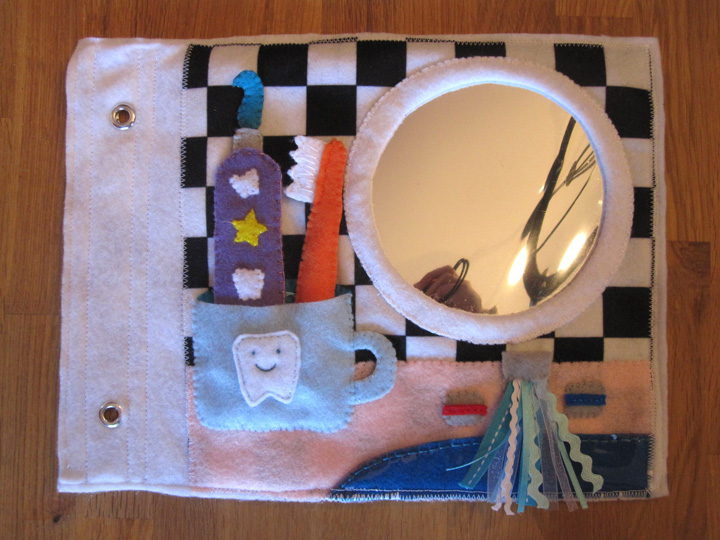
The toothpaste and brush are attached by a ribbon inside the cup. The toothpaste tube actually slides on its ribbon and makes a crinkly noise. The toothpaste swirl is at the end of the ribbon so you can put it on the toothbrush. I didn’t want it separate or it would get lost. The water in the sink is a bluish vinyl from my scrap stash layer over aqua felt and the running water is a bunch of blue and white ribbon scraps.

Here’s what I used: checkerboard printed felt background, kid-safe mirror cut from an old book, felt (in pink, aqua, sky blue, lavender, orange, red, blue, gray and white), ribbons and ric-rac, batting/stuffing, a crinkly cereal bar wrapper and embroidery thread to match.

My pattern doesn’t include the counter or sink shapes since everyone’s pages are different sizes. Depending on what size mirror you are able to rind, freehand it to what fits your layout best.

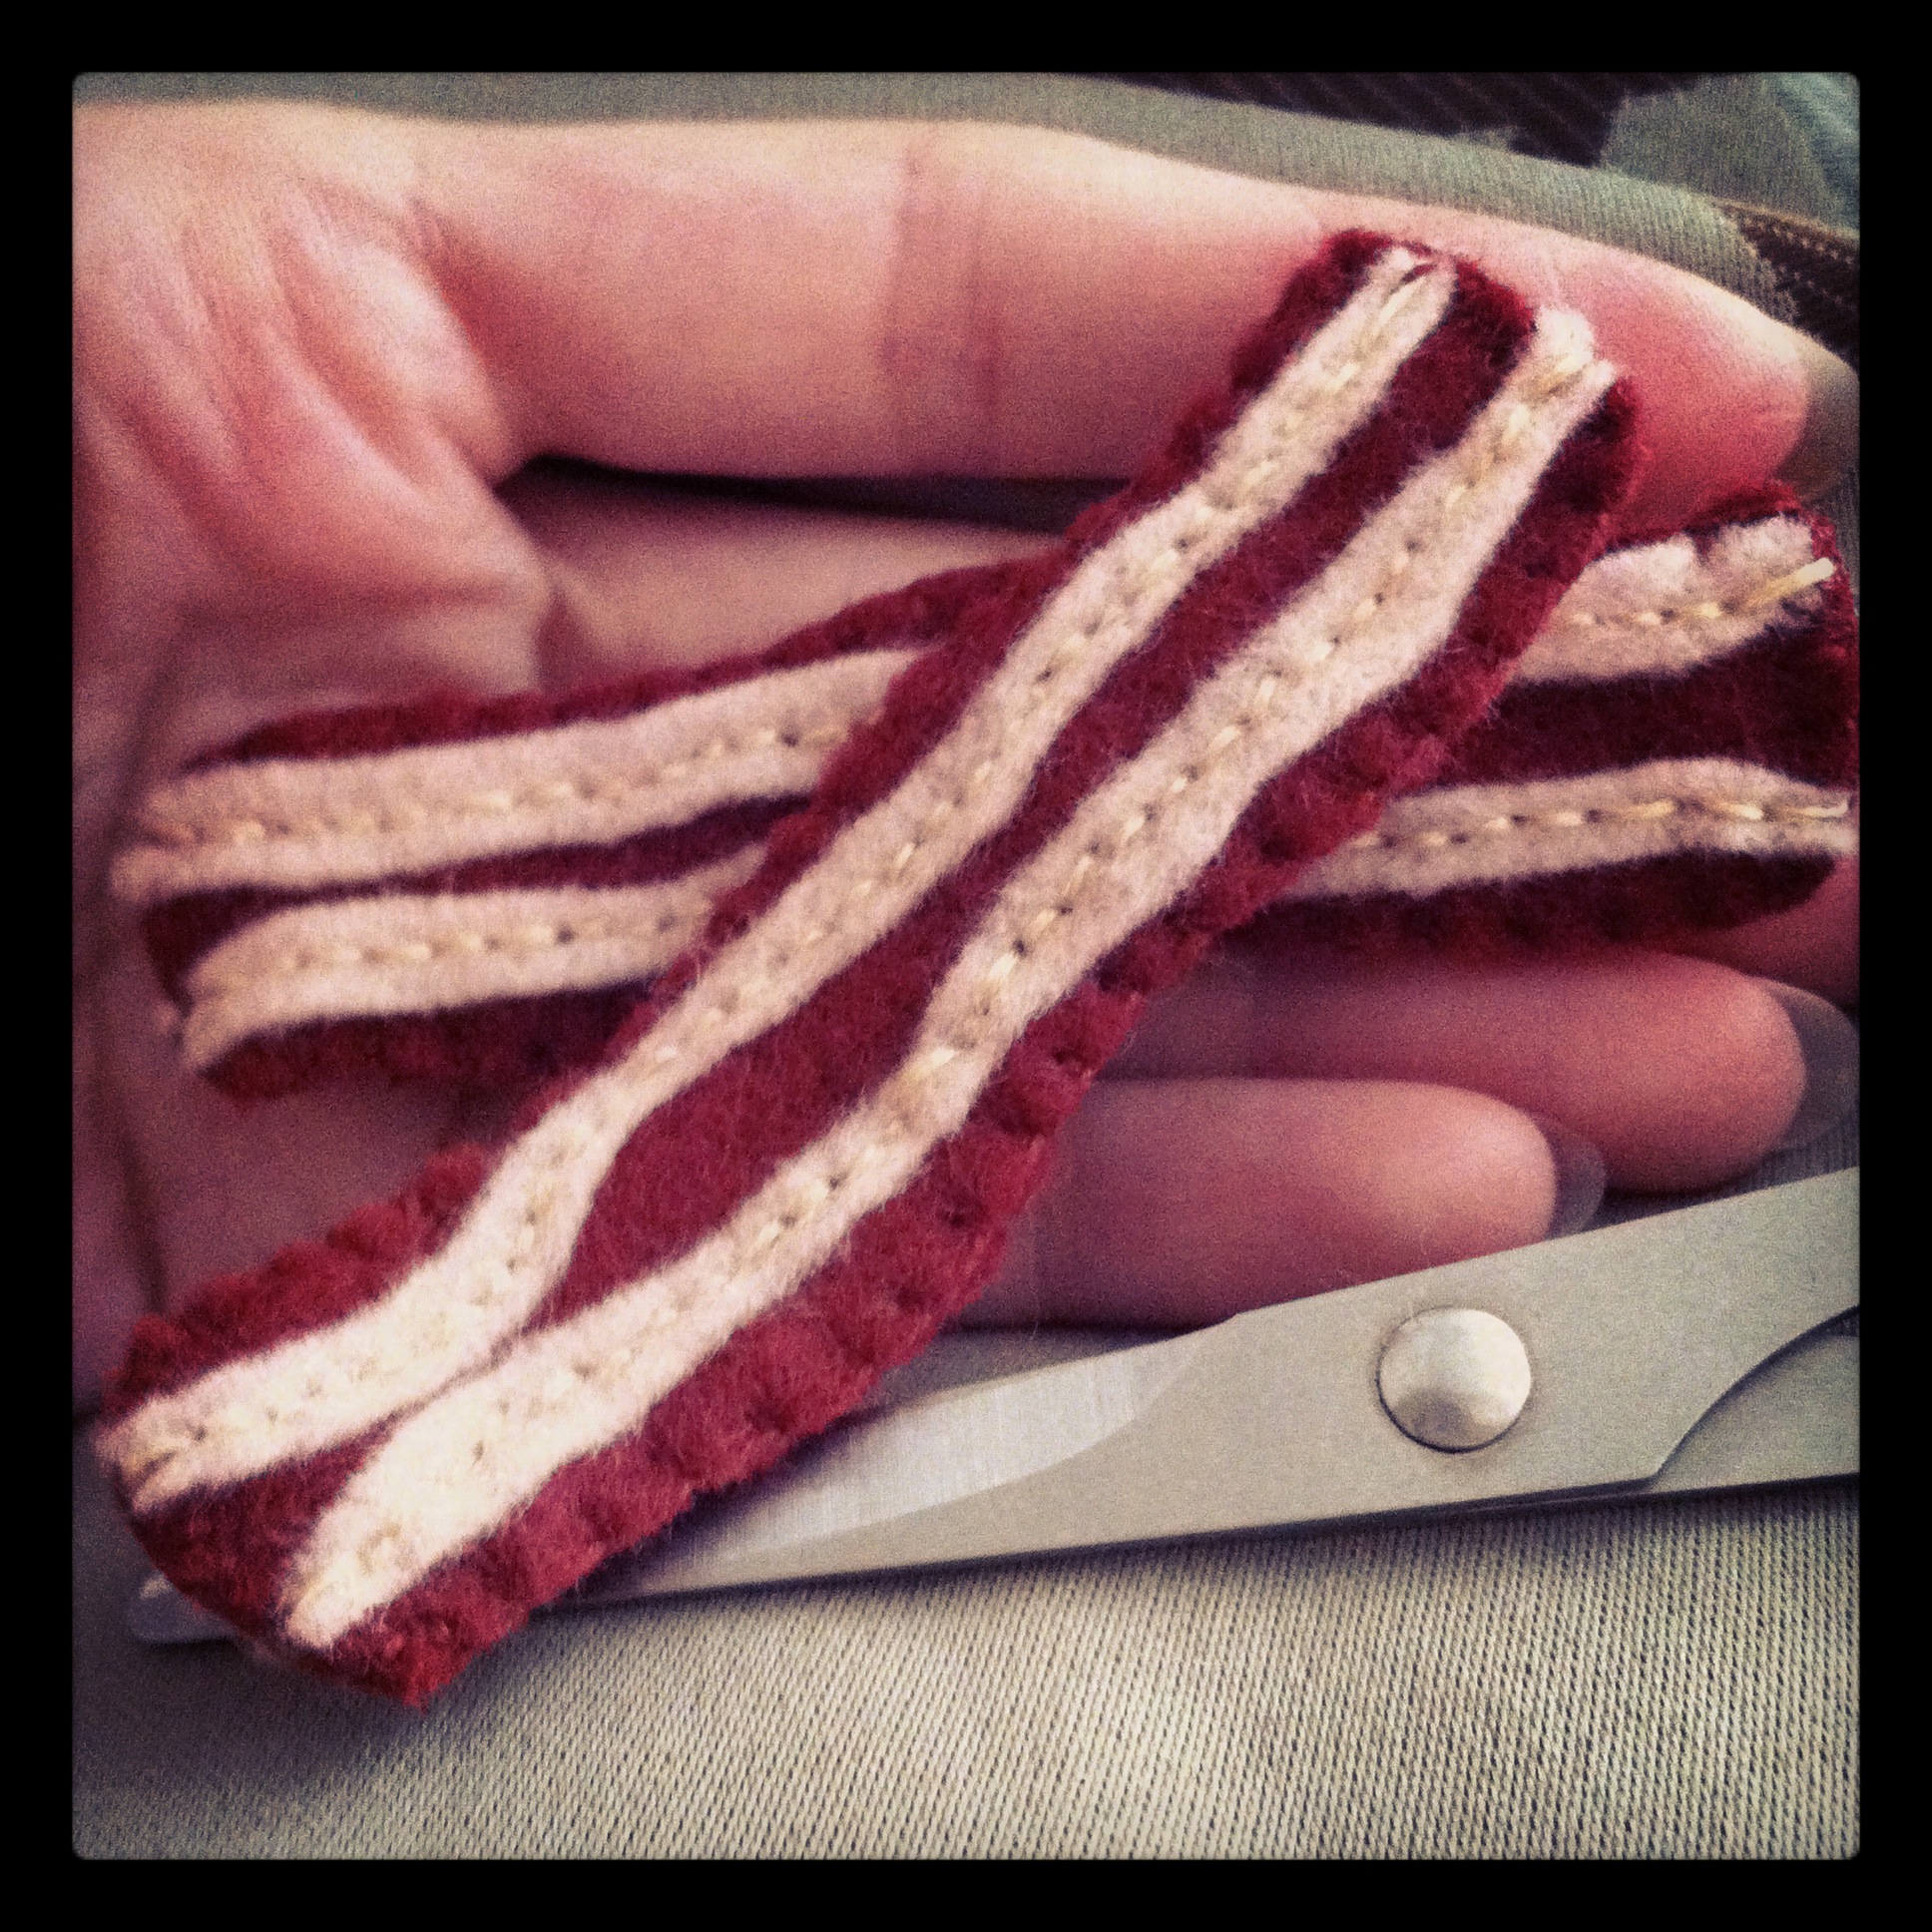
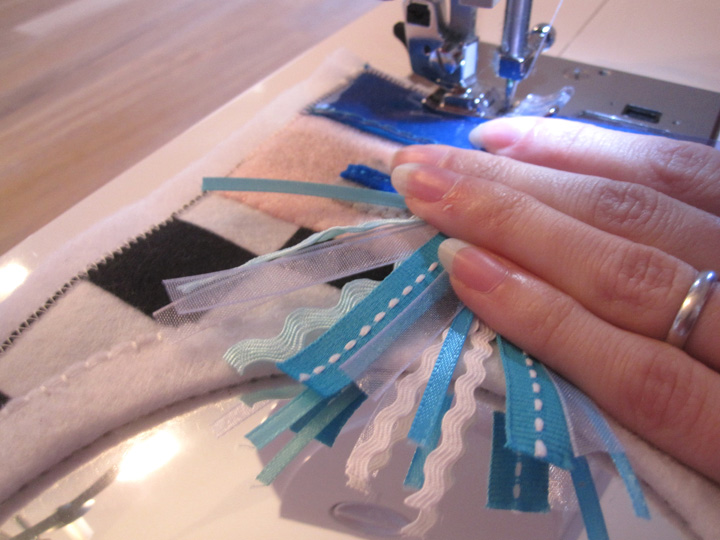
I did all the sewing by hand on this page (sewing machine time is rare in my house!) To start, I sewed down the counter, sink and mirror. I sewed the hot/cold stripes on the faucet knobs and sewed them down (you could make yours circles with buttons and have them turn if you want to get fancy!) I sewed the bottom 3/4 of the faucet on, then folded down the top. I folded a variety of ribbon scraps in half and stitched them into a bunch. I sewed them down under the fold of the faucet then stitched the edge down.

Next was the cup. I sewed down the inner cup piece. I made a smiley face on the tooth and sewed it to the cup front. I sewed the handle pieces together and pinned them in place. I took a long ribbon – long enough for both the toothpaste and toothbrush – and folded it in half. I stitched the mid-point down under where the cup would go. Then I just sewed the cup front on, leaving the top open to make the pocket.

On the toothpaste, I sewed the teeth and stars to the front piece. I cut a piece of crinkly wrapper (mine was a Trader Joe’s cereal bar) to fit in the tube and put it and one of the halves of the ribbon in between the two sides. I sewed along the sides of the tube and along the bottom, but left a gap in the bottom-middle so the ribbon could slide. At the top, I sewed the grey cap pieces to each side of the toothpaste tube, then sewed them into a tube around the ribbon. At the end of the ribbon, I sewed the two halves of the toothpaste. I may add a stripe of glitter paint to the toothpaste if I have a color that works.

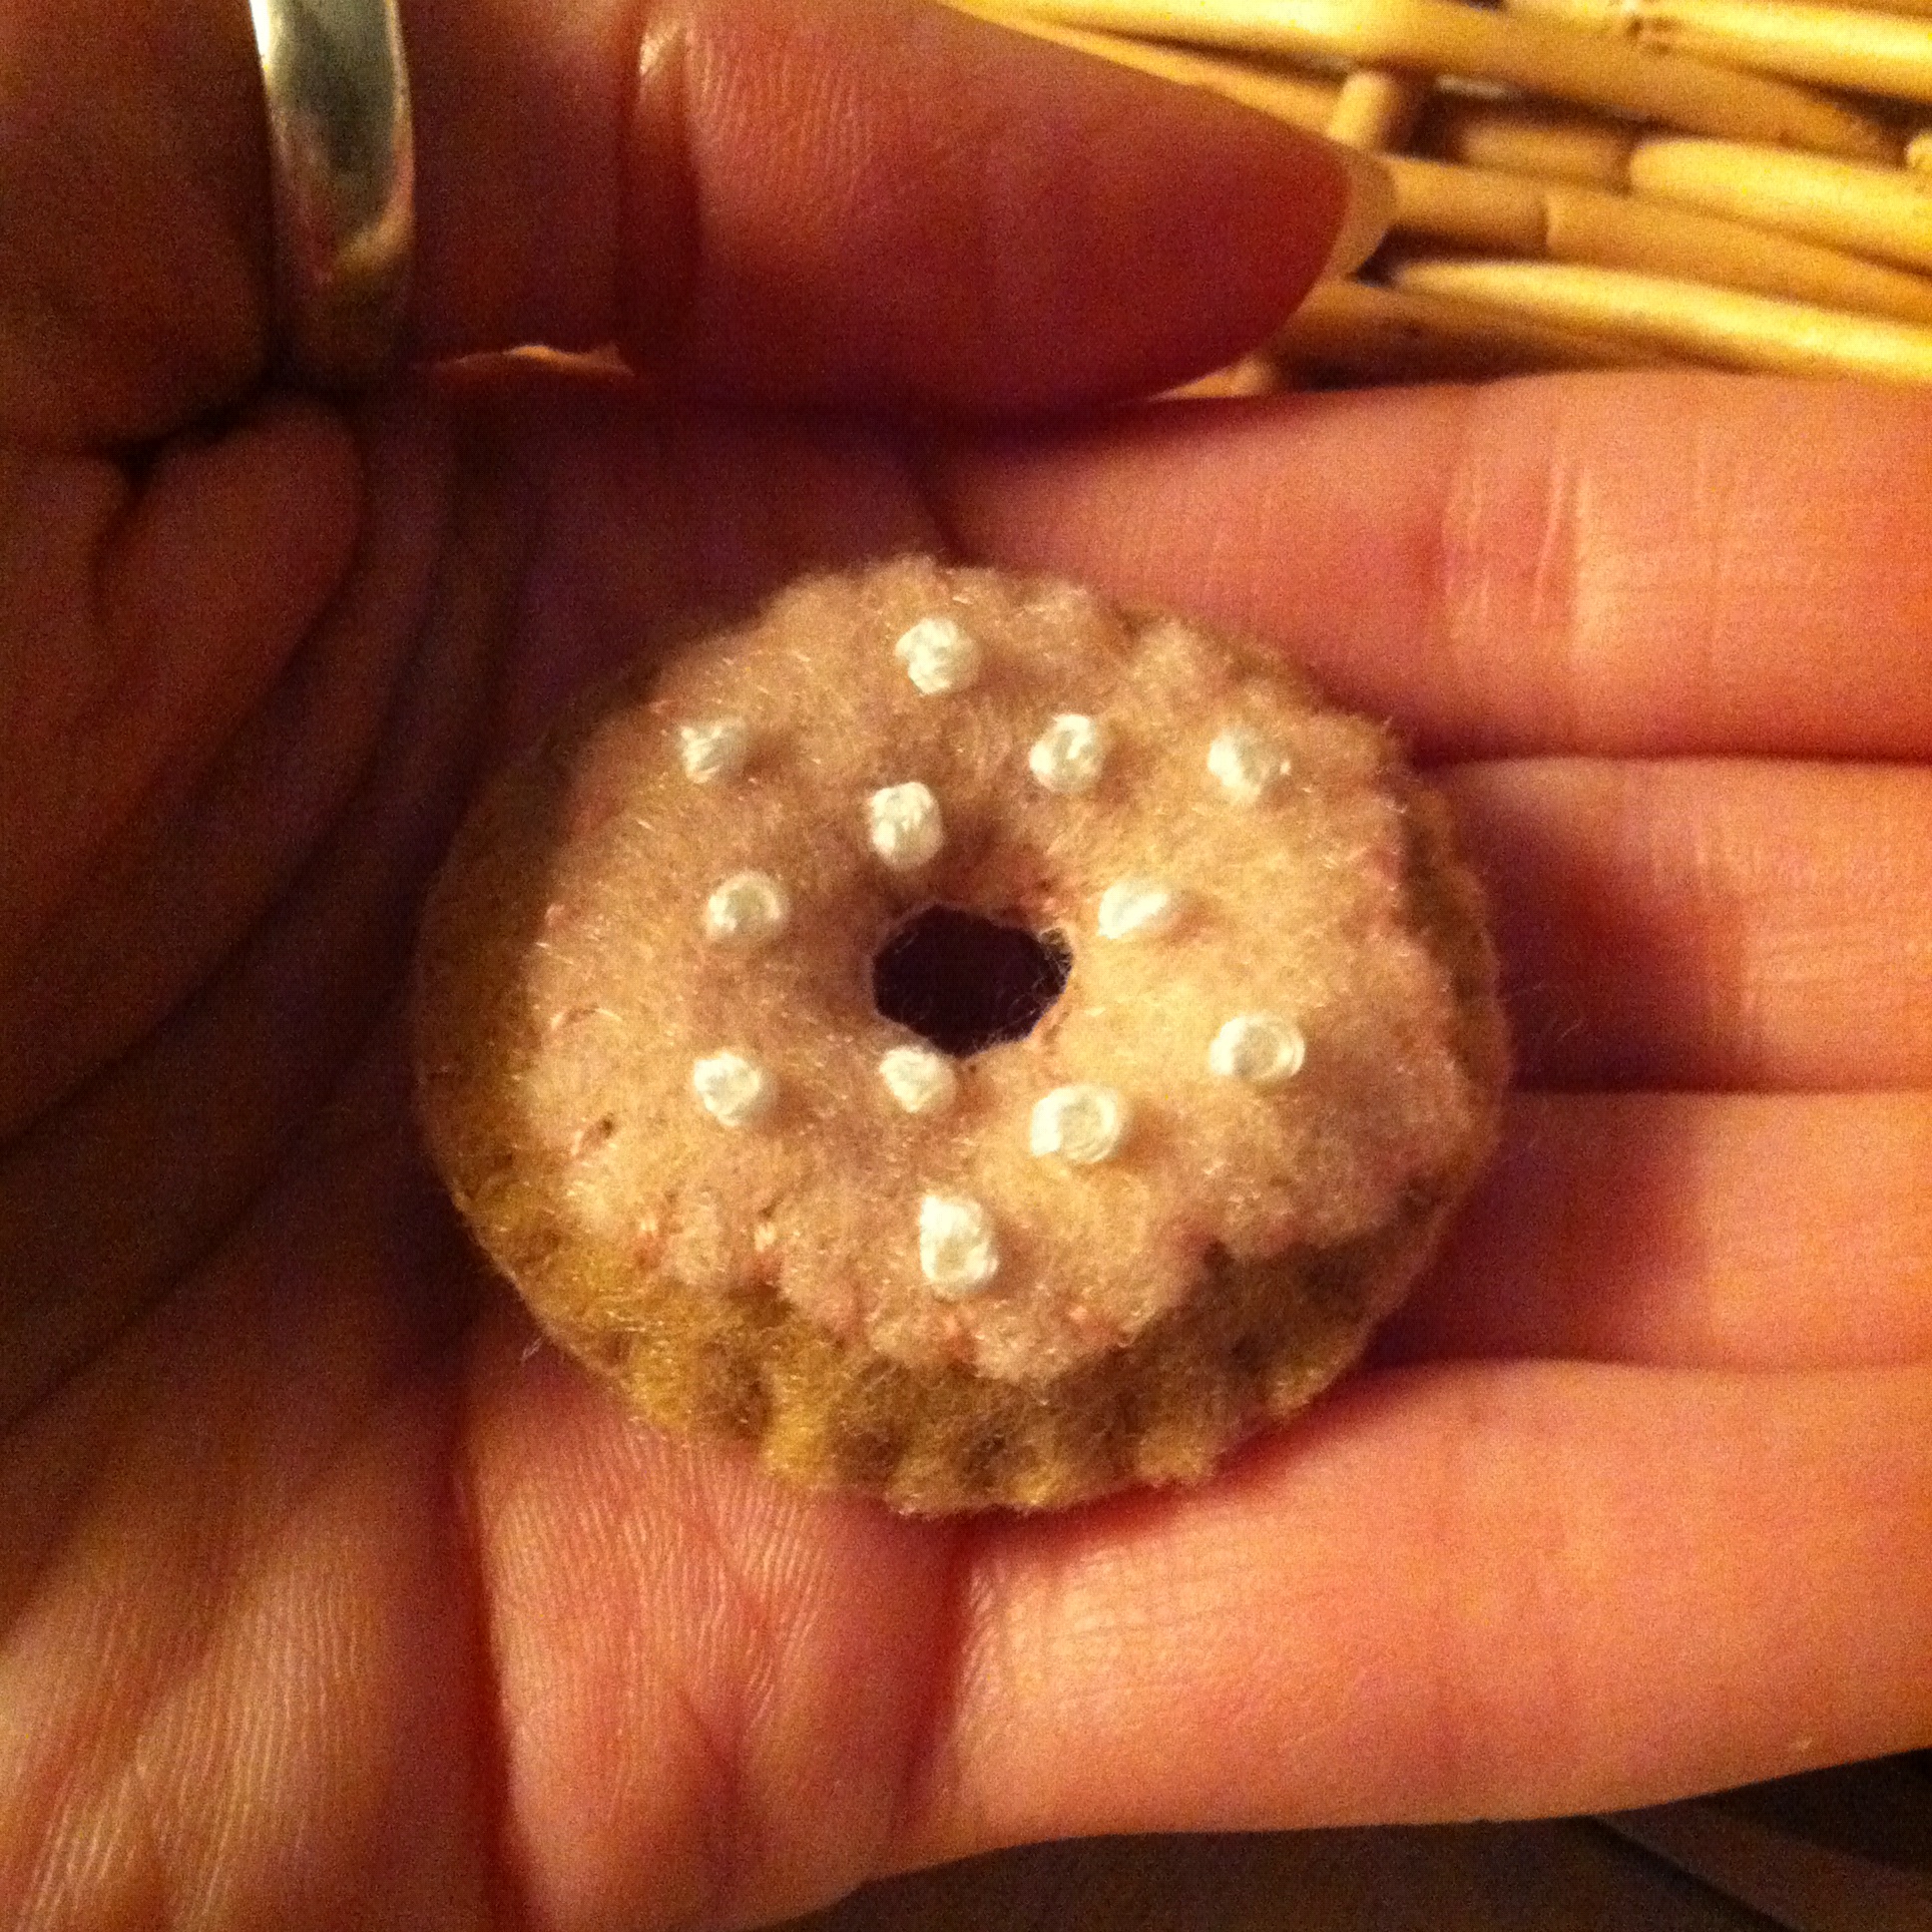
For the toothbrush, the toothpaste bristles were sewn together then decorated with long stitches. I layered them between the two handle pieces along with some batting with the ribbon sandwiched at then and sewed it together.

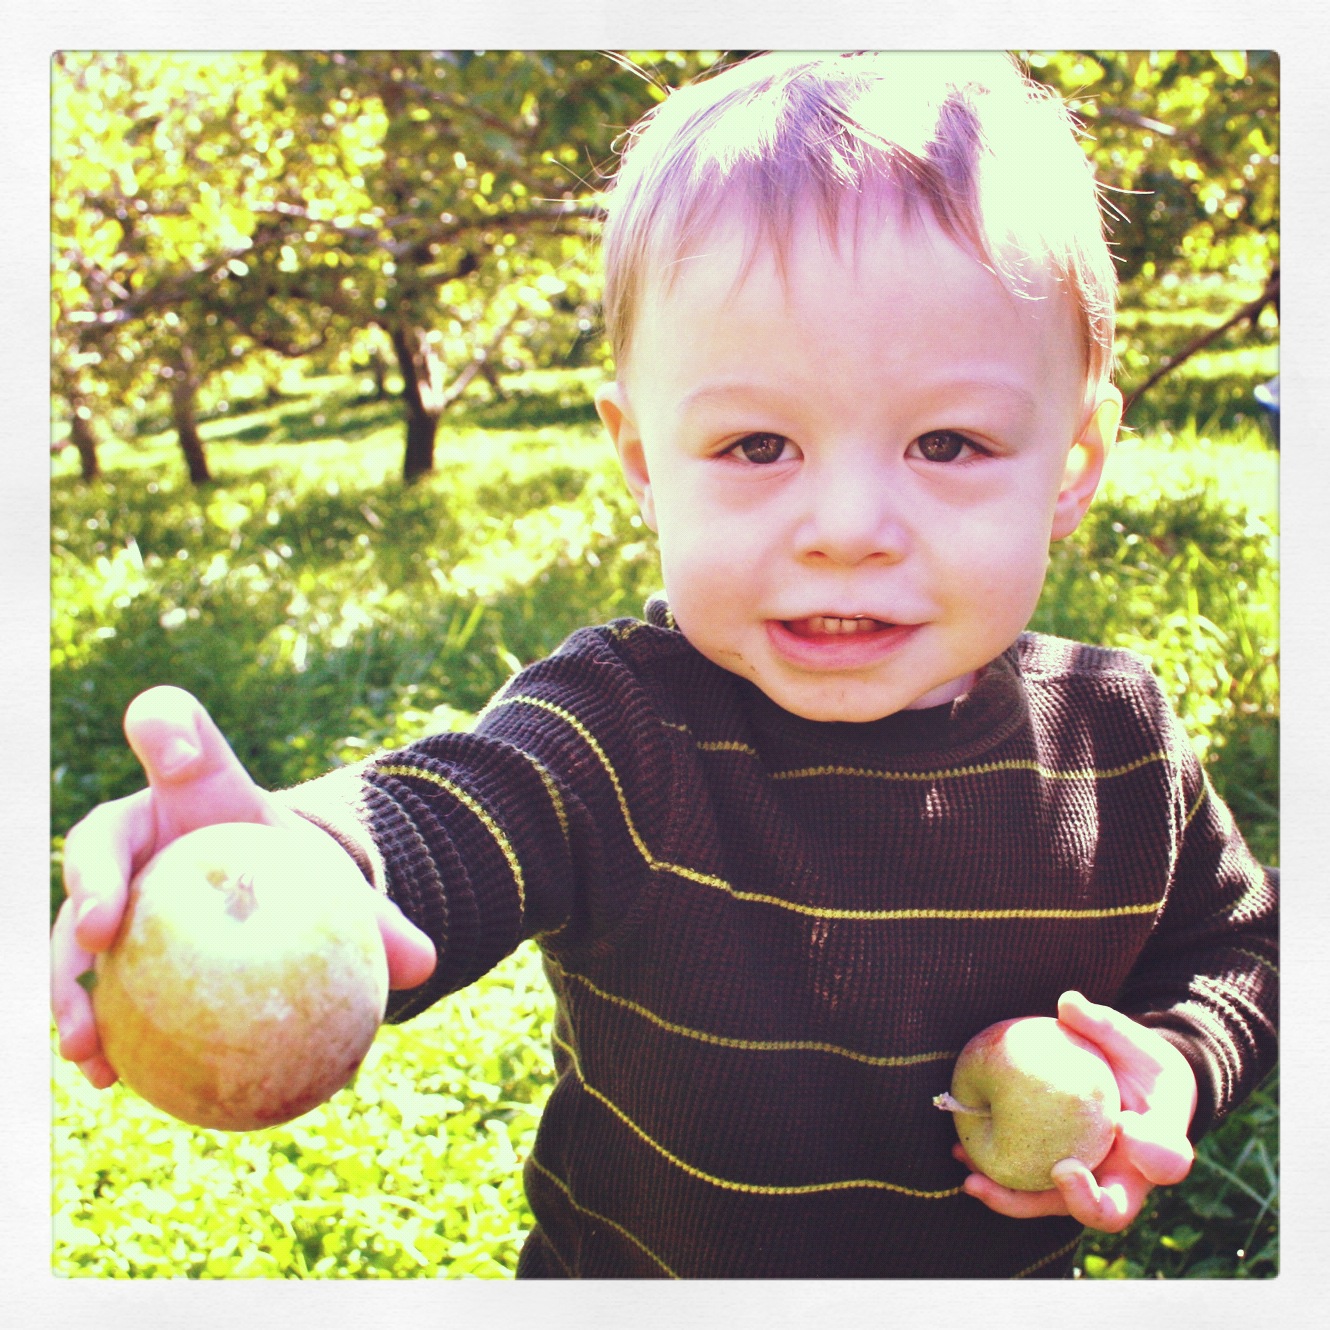
Do you like it? Jax sure does! He keeps looking in the mirror and saying “Baby!”

If you use this pattern, leave me a comment with a link so I can check your version out!

Quiet Book Progress

While the majority of my Quiet Book sewing is on hold while I work on Jax’s Halloween costume, hand sewing pages can still be worked on during the times I am watching Jax and can’t get to the sewing machine.

So what to make next?

Here’s some options on my list: a city map page for driving cars, a toothbrush and mirror page (Jax LOVES to brush his teeth!) and a mailbox page (his would be Blue’s Clues themed. He gets to watch a Blue’s Clues episode after dinner.)

Any pages you’d like to see? What do you think I should work on next?

Thrift Store Gems

My main goal at the thrift store this week was to find a stuffed animal with black fur to cut up and use on Jax’s Halloween costume. Best I found was black crushed velvet, which is just not furry enough. However, I did find a lime green tee shirt perfect for wearing under his costume coat!

Jax had a full-blown toddler tantrum as we checked out because I wouldn’t let him put toy cars into a box for a karaoke machine toy. Sorry, little dude. We paid and went outside to take some deep breaths in the fresh air. It’s just *so* hard to be a toddler!

Here’s what we got for $7.50:

The green tee shirt I mentioned will save me money I was going to spend at the mall on something for under his costume. If I have time (hah!), I could decorate it. A rock ‘n roll motorcycle raglan tee. It has two small, faint green stains but I decided I didn’t mind. Kids get messy. A plaid button-down with drums and flames screen print. They had some Baby Gap jeans there, but they we skinny jeans. I held them up to Jax and just couldn’t go there!

This coat by Little Rebels was only $2.50 because it was on the Halloween costume rack. I think it’s super cute. Probably too big at this point, but we can try it on later with the baby stops wearing his crankypants.


I didn’t have long in the book section before Jax went all nuclear meltdown on me, but I found two good ones. What’s in Space? has tabs you can pull up. And a Melissa & Doug wooden book with wheels called Push and Go Cars and Trucks. Seems like that one isn’t available anymore.

I also bought two tiny metal cars to use in Jax’s quiet book on a future car/city/road page. They had two big bins of all sorts of Matchbox-style cars, but I just loved these smaller, vintage-looking ones. It’s nice that they have no windows so I can tie them to the book with a string. They are so much more timeless then the cars with all the branding and cheesy decals (though I probably wouldn’t turn down flames on the side of my car, hah!)

Find any thrift store gems lately? Please share!

Halloween Costume Progress

I got most of Jax’s hoodie completed for his Halloween costume. Can you guess who he will be?

Next step: zipper! I’ve never done a separating zipper and I’m going to have to shorten it.

I need to figure out if I should fit a mouth on him somehow. There wasn’t room on the hood. I’m going to the thrift store tomorrow morning to look for a stuffed animal with black fur to cut up and use to make the unibrow furry. Cheaper then the craft store!

Are you making a costume for your little one(s) this year?

Sunday Souvenir – Family Photos

When my aunt visited in April, she gave me copies of scanned family photos from my mom’s side. There are some really great ones I hadn’t seen.

This is my mom’s parents on their wedding day. How gorgeous is my grandma?? And grandpa looks so handsome. I’d never seen these before!

And they were even stylish in the 60’s and 70’s. Check out this photo. I love every single thing about it. I want that dress!

Here are a few more family photos. Some get-togethers and a holiday card. My mom is in the dark coat in the Christmas card, is the tallest one in the middle picture, and is on the far right in the last photo.


Have you discovered any old family photos decades after they were taken? These are such a treasure for me!

Leave a comment if write a Sunday Souvenir and you’d like your link to be added!

Check out Ronalyn’s Sunday Souvenir at The Adventures of Esa & Zed

Ocean Counting Quiet Book Page

I’ve been so super busy between work and starting Jax’s Halloween costume, plus starting to get ready for our California trip in two weeks. I’ve also sewn a bunch of his quiet book  pages into their final double-sided pages with grommets. So much to do! But today I got another page done at last!

I love the beads-on-a-string style counting pages that are common in quiet books, and when I came across these ocean life beads in the kids’ craft aisle of Joanns, I knew I had my theme.

It’s a pretty simple page in terms of cutting and sewing because the beads are so crazy.

Here’s what I used: aqua felt background, felt (in natural, lime, yellow, hot pink, blue, orange, purple and browns), blue ribbon, ocean beads and embroidery thread to match.


I started by sewing down the sand. My page is 9″ wide. If yours is different, you’ll need to adjust the sand pattern accordingly. You can totally just freehand it!

I sewed down all the numbers then went back with pale blue floss and did a stem stitch border around them to make them pop.

On the coral, I made large French knots randomly all over instead of sewing it down normally. For the plant, I stitch down the center of each leaf. I sewed down the starfish, then cut out some pebble shapes in tan and brown and sewed them on.

For the counting beads, I used 3 lengths of ribbon. I would sew down one end, add the beads and sew down the other end. I also sewed the ribbons into separate sections so they didn’t droop. I then cut out some bubble shapes and sewed them down over all the ribbon stitching.

All done! I think Jax is going to love this page because he gets so excited when he sees these beads.


What do you think? If you use this pattern, leave me a comment with a link so I can check your version out!